Continue to Site

Eng-Tips is the largest engineering community on the Internet

Intelligent Work Forums for Engineering Professionals

  • Congratulations waross on being selected by the Eng-Tips community for having the most helpful posts in the forums last week. Way to Go!

Assembly Remove

Status
Not open for further replies.

descatia

Aerospace
Dec 7, 2008
65
US
How do you isolate the 2 parts after an assembly remove? I have a rectangular extruded pad, sitting on a thin circular dish, and I did the assembly remove, and it took out a circular arc of material = the thickness of the dish from the rectangular pad. Now I have 2 pieces that are separate, but if I try to delete the smaller piece, in the catpart file, which is what I want to do, then the whole rectangular pad disappears, including the part I want to keep. Hide/show does the same thing. How do I de-link theses 2 pieces, and delete the part I don't want. (I don't want to make the thin dish into a solid umbrella type part, because that brings up a whole bunch of other problems)
 
Replies continue below

Recommended for you

You could try to split the solid from a plane on the desired piece. If you need to use both segments independently, just copy the body and perform the split twice.

EDIT: Or, you could extract the desired body, then "Close Surface" into a solid part.
 
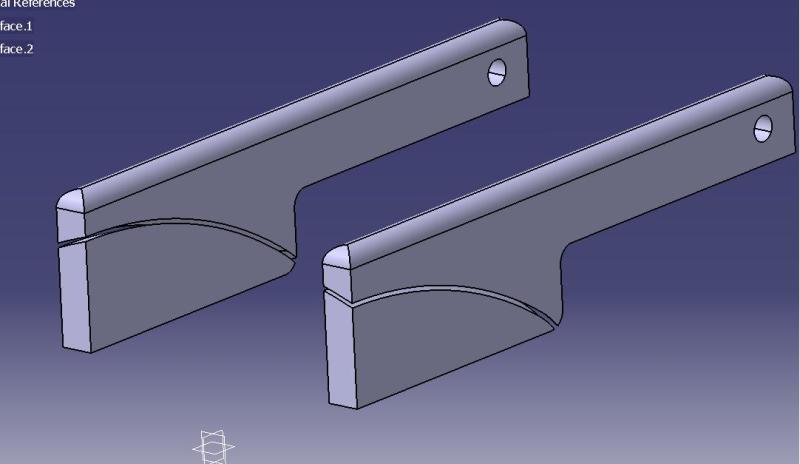
The solid is already in 2 pieces. I don't know why the 2 pieces look disconnected, but act like the same body. I have included a picture to explain my problem a little further. The smaller piece at the bottom needs to be deleted or hidden somehow.

untitled_qxnrdv.jpg
 
Sorry descatia,

Let me explain a little better, now that I have a picture to refer to.

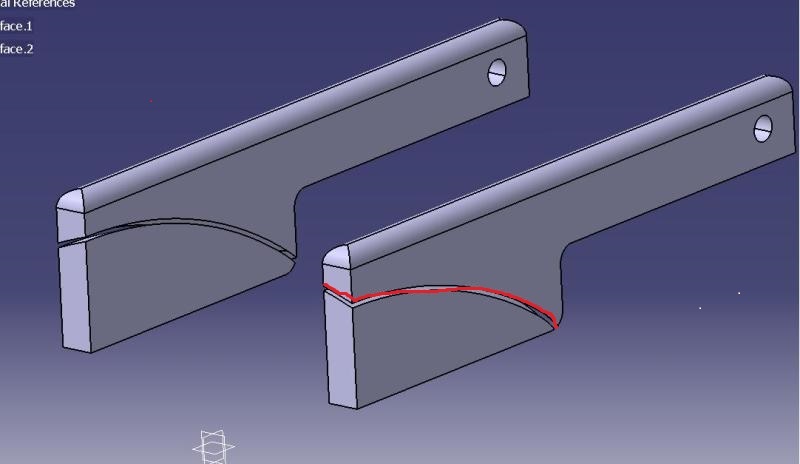
Yes, there are two VISIBLE pieces in your part, but because they exist in the same body, it is considered to be one part. You will have to manually remove the bottom piece by using a split or something similar. There are a few ways to do this.

1) You can use the feature "Remove Face" (located in Part Design, toolbar is called "Dress-Up Features"), to remove the bottom piece.
2) Create a new body, extract the top piece, then use that extracted surface to create the body. The feature is called "Close Surface" (located in Part Design, toolbar is called "Surface-Based Features".
3) Lastly, you can extract the curved surface (see screen cap below), and use it to split the part.

untitled_qxnrdv_hpaxhc.jpg


This is just a couple of ways I would approach this issue. I'm sure there are lots of other users, that have more knowledge, that can assist you as well.

Cheers,
 
There is also a Boolean Operation called Remove Lump which could accomplish a similar end result.

--Doug
 
Status
Not open for further replies.

Part and Inventory Search

Sponsor

Top