Continue to Site

Eng-Tips is the largest engineering community on the Internet

Intelligent Work Forums for Engineering Professionals

  • Congratulations GregLocock on being selected by the Eng-Tips community for having the most helpful posts in the forums last week. Way to Go!

Finding Leaks

Status
Not open for further replies.

MFJewell

Mechanical
Mar 2, 2017
366
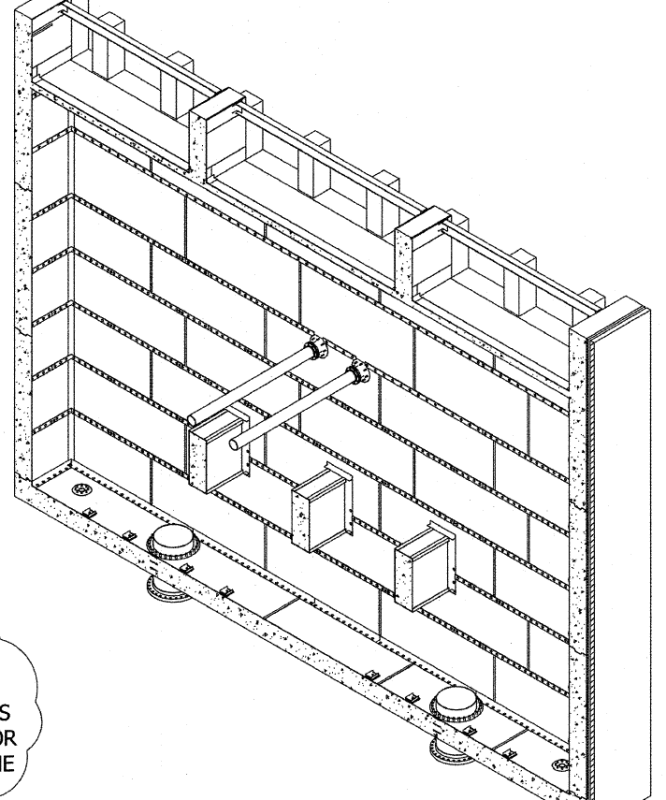
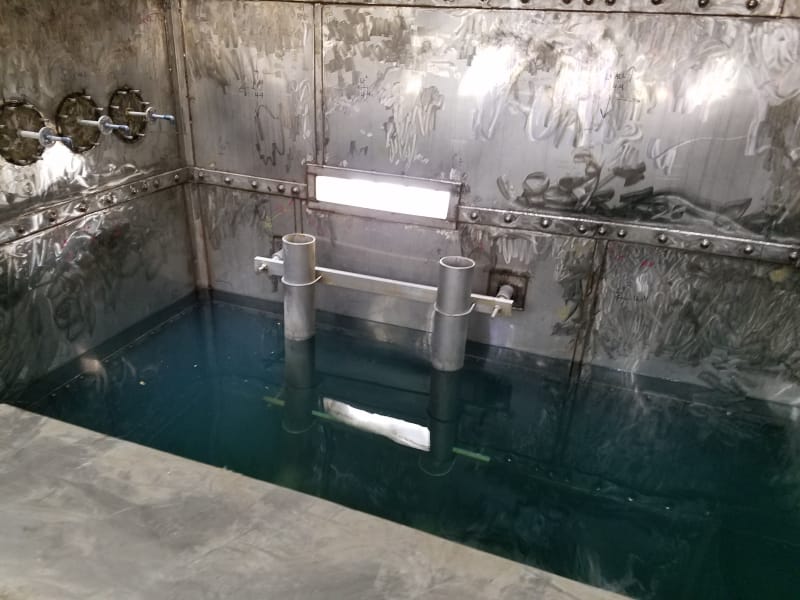
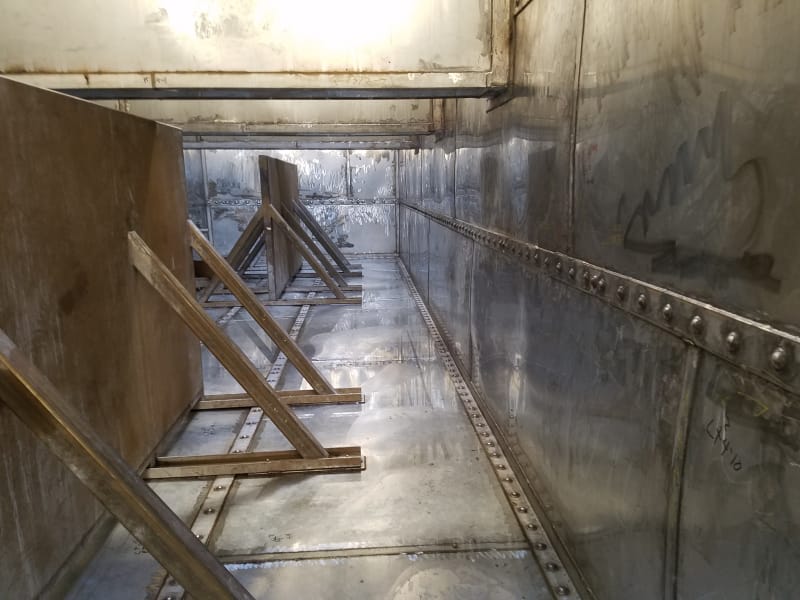
At my facility, we are currently lining 5 sumps (35' deep x 13.75' wide x 47' length) with stainless steel liner. Essentially, these are field fabricated 316 SS tanks built inside sumps. The sheet is 0.125 and most of it is 10' w x 4' high in size. At the horizontal seems, there are 0.25 inch thick straps with anchor bolts every 6 inches. The vertical seems have 2" wide straps with no anchors. The sheet is laid against the sump walls and floors which are 18" thick steel reinforced concrete. We also have 14 weep holes per sump to monitor for lining failure (2 on the floor, 12 on the walls). I have included an iso cut for reference.

Each sump has ~ 1 mile of weld. The QA/QC included visual, dye pen, and vac boxing. Sump 1 has failed three hydro tests and sump 2 has failed twice. All failures resulted from water flowing from the weep holes underneath the floor. Sump 1 is currently on the fourth go around of QA/QC inspection. The contractor has tried putting air behind the sheet (both with and without water in the sumps) to see if bubbles appeared or air leakage was detected, but they didn't. They never built any pressure behind the sheet, so we suspect all the air was making its way to the top and escaping through an unsealed area. They hired a 3rd party CWI to reinspect, which resulted in nothing found. They are going to try ultrasonic testing today to see if they can detect leakage locations. X-ray is out of the question because of the concrete behind the sheet.

Anyone have experience with a situation like this and/or have thoughts on other methods to detect leaks?

Sump_n8gtnb.png
 
Replies continue below

Recommended for you

Yup, Been there done that. Major PITA

The usual suspects are any penetration or sealing of holes, connections etc - I couldn't quite work out that iso drawing but there seem to be a number of potential leak paths. Do you have a photo or two?

Take them all apart, fill them with the stickiest sealant you're ever come across and try again.

On at least two occasions I had to fill the bloody thing, monitor the leakage and then slowly bit by bit lower the water level 50-100mm at a time, wait to see if it stopped dripping / level stops going down. Normally you go down and down and down until it stops at the last level, but you never know. If the water level is protected from the wind sometimes you can see the water flowing out the hole or gap with a ripple on the surface.

Then at least you can determine the band to concentrate your efforts on.

It can take some time but is the only way to find a small leak, but odds on it's one of the penetrations.

I'm quite glad you never managed to build up air pressure. Even 1 or 2 psi could have very easily collapsed a thin shell lining. I spent a year of my life repairing a tank liner which had collapsed inside a concrete outer shell. Don't try that again. Please.

You might be able to do a tracer gas / Helium tester around the welds and connections, but filling it with water is cheap and easy.

Very good luck and let us know what happens.

Remember - More details = better answers
Also: If you get a response it's polite to respond to it.
 
LittleInch said:
The usual suspects are any penetration or sealing of holes, connections etc - I couldn't quite work out that iso drawing but there seem to be a number of potential leak paths. Do you have a photo or two?

Take them all apart, fill them with the stickiest sealant you're ever come across and try again.

Everything is seal welded, nothing can come back apart. Even the anchor bolts have seal welded caps on them.

Sump_2_Hydro_rrcroy.jpg
 
Oh well - plan B -fill it with water and then lower and wait.

Might take a long time, but will find your leak or narrow it down to a band.

Of course there might be more than one leak....

Remember - More details = better answers
Also: If you get a response it's polite to respond to it.
 
Nice looking tank BTW. I can understand why you're upset it is leaking.

Remember - More details = better answers
Also: If you get a response it's polite to respond to it.
 
LittleInch said:
Oh well - plan B -fill it with water and then lower and wait.

Might take a long time, but will find your leak or narrow it down to a band.

That is what we are doing on sump 2. However, due to oil canning effect on the sheet, we suspect leakage may be at the bottom, but may not show up until there is enough hydrostatic pressure to flatten out sheets on the floor and lower courses. Once the level drops back down, the leak source closes up and leakage stops or is significantly reduced.

Sump_1_Complete_Looking_West_2_ornxdf.jpg
 
Have you considered using a dye to test for leaks? Have you confirmed that the leak is coming from the tank and not groundwater.

Start filling the tank from the bottom at a slow rate and monitor the test sump. You may be able to determine the elevation of the leak.

Good luck.

 
There are helium tests for leakage, but I'm not familiar with the details.
Past comment from field guy- early in the morning, look for damp spots on the plate. Water vapor coming through the leak will condense around the leak as well. Not a substitute for any other test, but easy to do in the right conditions.
 
bimr said:
Have you considered using a dye to test for leaks? Have you confirmed that the leak is coming from the tank and not groundwater.

We have considered dye, but to selectively cover 5400 linear feet, then put water on it and hope it shows at one of the weep holes is low probability of success. We have also consider helium with a sniffer but suspect it will be the same as the air test (where the helium just blows out at the top). Another thought was florescent dye, but we would need to inject behind the sheets at pressure. The sheeting is designed that anymore that 1 foot of head behind it can cause the sheets to fail, so we have been very cautious with putting anything behind the sheets.

As for groundwater, these sumps are built into the second story of one of our chiller buildings. The bottom of them is 31' above grade, so it isn't groundwater.
 
Ultrasonic testing did not detect any anomalies. Several repairs were made based on visual, dye pen, and vac box inspections. Hydro again last night and it failed again.
 
I think I might try helium. It does not need much pressure and is very sensitive - slow but sensitive. Tape off obvious leak paths first. Resist the temptation to use a lot of Helium. Is it possible that there is a reservoir of water underneath that is being squeezed to the weep holes then there is hydrostatic pressure? Let me get this straight - you have a lapped bolted tank with batten bars, the batten bars and bolt heads are all welded? You did an 8-10 psi vacuum box test and PT on all welds? What about the corners? Note - you have a lot of long linear passageways where water can travel, masking the real leak. Can you put a tracer dye in the water to make sure you are getting new leaks? My guess is you have a leak in a corner that moves along a seam and eventually comes out where it can. Wishing you all the luck!!!
 
Is it possible that there is a reservoir of water underneath that is being squeezed to the weep holes then there is hydrostatic pressure?

We definitely squish residual water out when we initially fill, but eventually the leak rate stabilizes and is consistent for 24 hours or more.

Let me get this straight - you have a lapped bolted tank with batten bars, the batten bars and bolt heads are all welded?

All seams are seal welded. The lining is 0.125 sheet lapped underneath 0.25 bar stock. The bar stock is drilled and anchor bolts go through the bar stock. All the anchor bolts have domed, seal welded caps.

You did an 8-10 psi vacuum box test and PT on all welds? What about the corners?

100% visual, 99%+ were vac boxed, dye pen were vac box could not get. Most of the corners were vac boxed as well. They built about a dozen different boxes.

Can you put a tracer dye in the water to make sure you are getting new leaks?

We are confident it is leaking and dye is one of the options they are looking at. Right now, nothing is off the table.
 
A technique used to find tiny leaks in molds for autoclave curing of carbon fiber parts is as follows.

Line the surface with a porous sheet of white polyester felt (breather material).

Spray the sheet with phenolphthalein solution ( It is the color changing agent in litmus paper.

Cover this with a clear polyethylene film which will be a vacuum bag. Seal the plastic film to the tank wall and pull vacuum on the breather material. The plastic film will suck tight to the wall of the tank.

Spray ammonia water into the space outside the tank. Ammonia fumes sucked through any leak will turn the breather material blue at the leak location. This method is very sensitive and will find even tiny leaks very quickly. But ammonia is very pungent.

In your case a modified procedure may be better. When you pull vacuum initially any water under the floor would be pulled through a leak into the breather and you could clearly see this. But once the breather is saturated with water you will no longer be able to see where the leak is. If you saturate the breather with water intentionally you will be able to see where air gets sucked into the breather through a leak, causing a stream of bubbles. As long as you maintain a vacuum you can test a wall up to 20 feet or so in height. When you release the vacuum the water will drain down to the bottom of the tank.
 
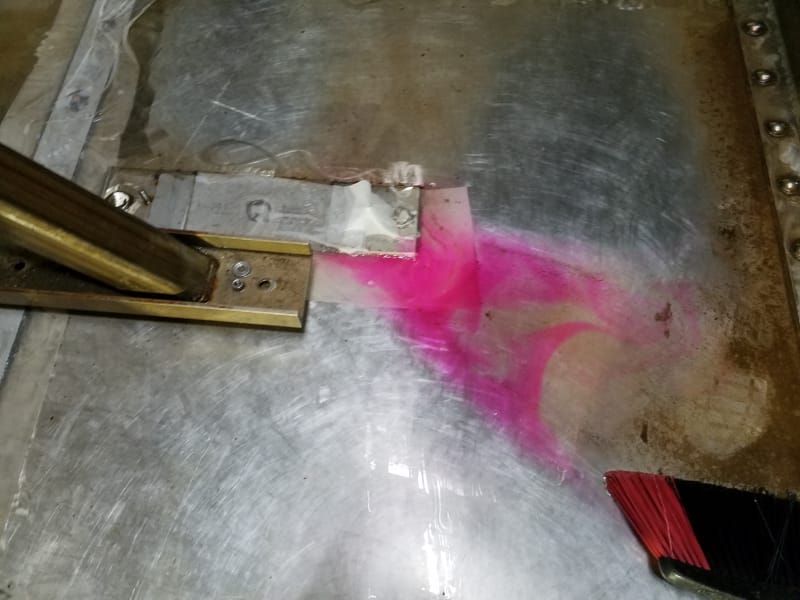
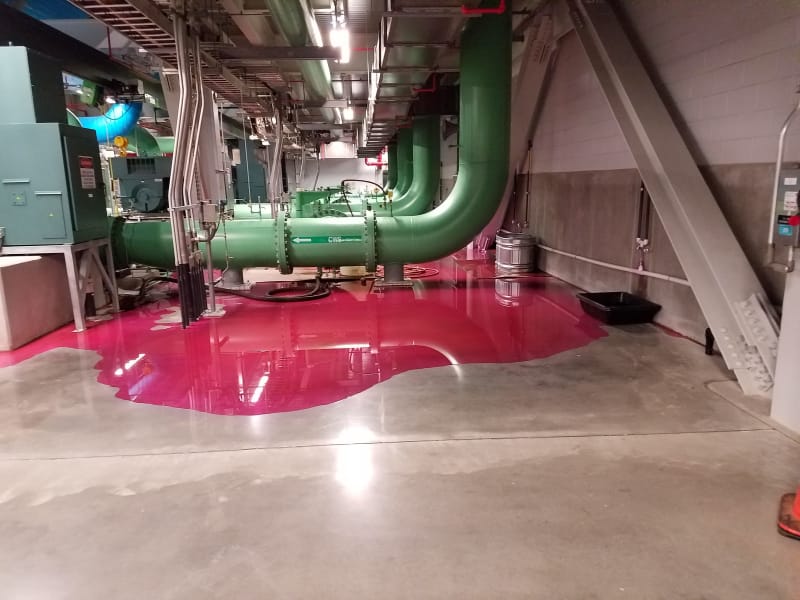
Did a reverse hydro/dye test and found one large flaw. Repaired it and rehydroed the sump to find leakage rate unchanged. The contractor also managed to spill about 100 gallons of dyed water all over the building.

Sump_2_Dye_Test_Leak_1_v1axdu.jpg

Sump_2_Dye_Test_Spill_opjd7e.jpg
 
Status
Not open for further replies.

Part and Inventory Search

Sponsor