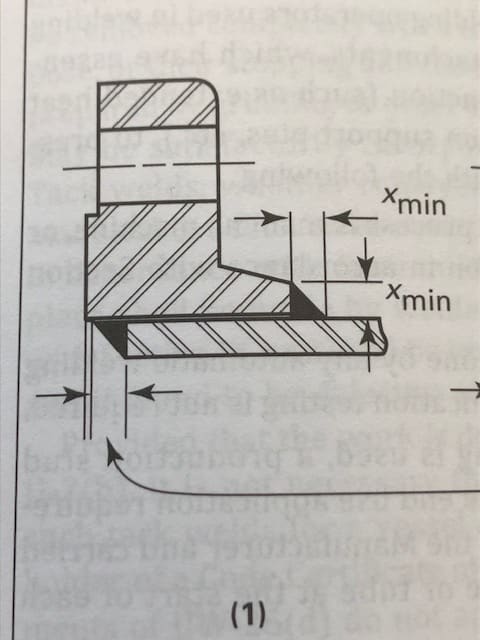
Two questions have been bugging me about the little detail in UW-21 (ASME B&PV Code Section VIII Part 1) and the similar details in Figure 2-4. I think I asked these long ago, but don't recall ever seeing a definite answer, either.
For that inside fillet, is corrosion allowance supposed to be added to the throat dimension?
And, for either fillet, is there any requirement to increase the fillet depending on the weld gap size?
And perhaps more importantly, is anyone aware of any reference that actually answers these items? Seems this SHOULD Be in the code, but I'm not finding it anywhere. I find some provisions in AWS D1.1 and AWWA C207, etc., but not here where I need it.
I assume "nominal" thickness of the pipe is as-built thickness (or is this wrong?), so adding CA can in some cases make the fillet bigger than will fit in there.
On larger flanges, the weld gap details as 1/8" prior to the inclusion of any tolerances.
The software I normally use assumes "not" in both cases, so it can show a 1/4" fillet over a 1/8" gap even when a corrosion allowance is specified.

