Continue to Site

Eng-Tips is the largest engineering community on the Internet

Intelligent Work Forums for Engineering Professionals

  • Congratulations KootK on being selected by the Eng-Tips community for having the most helpful posts in the forums last week. Way to Go!

machining a long tube (380mm)

dogbural

Aerospace
Jan 25, 2009
74
Hi,

Our supplier have to machine a long tube (OD: 55, ID: 53, Length 380mm) from thicker tube (OD 58, ID 50)

They use a CNC lathe machine and when they machine ID, they machine from both ends - machine one end and flip it for the other end.

It is apparent to see the a little bumpy line at the mid point.

Drawing requirement is that total runout of ID should be 100 micron in reference to OD surface.

What would be best way to machine such a long tube?
 
Replies continue below

Recommended for you

its a common problem with long piece and small ID. seems like cutting tool wear out. can't you re-machine it again? if you already done it, is it still bumpy?
 
You may want to consider contacting a shop that has gun drilling capability:

 
Hi,

Our supplier have to machine a long tube (OD: 55, ID: 53, Length 380mm) from thicker tube (OD 58, ID 50)

They use a CNC lathe machine and when they machine ID, they machine from both ends - machine one end and flip it for the other end.

It is apparent to see the a little bumpy line at the mid point.

Drawing requirement is that total runout of ID should be 100 micron in reference to OD surface.

What would be best way to machine such a long tube?
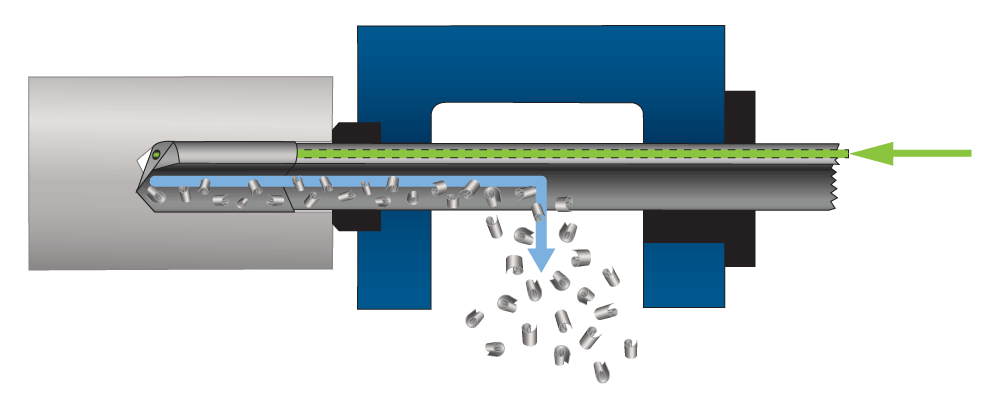
Make their own boring bar out of hex steel bar and mount a small 1/4”dia HSS insert in the side, fixing with a grub screw positioned in the end. Hold the tube on a Mandrel at one end, centre the other (with plug), turn the outside then hold the tube in a 3 jaw chuck and bore out the inside with the hex boring bar. Finish depends largely on the material but can be improved if necessary with fine emery mounted on a long piece of round bar.
 
Last edited:
OP
My opinion go to 3 different suppliers, ask them to give advice and willing to help and partner with you. Ask if is permissible to witness a first article.
Here a similar or one possible solution.
 
Others have covered fancier machining methods manufacturing well.

"a little bumpy line" leaves me with several un-answered questions.

Who designed this part ?
Maybe a brain-storming design review session could help mitigate the manufacturing difficulties.

What are the drawing requirements on surface finish, roundness, cylindricity etc for the bore, and the OD?

Other than the Bumpy Line, does machining from each end produce an acceptable part?

A "brush hone" could quickly produce a uniform surface appearance, and not change the measured ID much at all.

Does the ID bore have to be a continuous cylinder? If not, a shallow relief 25 mm long in the middle of the 380 mm length might mitigate objections to the visible bumpy line.

Welded tubing has good wall thickness control, and can have very good mechanical properties as well.

 
My only contribution - it's a good thing the OP put a length value in the title, since "long" is not a very definitive term. For example, in my equipment we regularly run axial through holes in cylindrical shafts ranging from a low end of 5500 mm up to 8500 mm. Hole inside diameters range from 100 mm up to 300 mm.
 

Part and Inventory Search

Sponsor