Continue to Site

Eng-Tips is the largest engineering community on the Internet

Intelligent Work Forums for Engineering Professionals

  • Congratulations KootK on being selected by the Eng-Tips community for having the most helpful posts in the forums last week. Way to Go!

Position value 4

Status
Not open for further replies.

naah

Mechanical
Jan 4, 2022
17
Hello
I am not an expert in the GD&T. I want to know how do you get the values for the position tolerans? are the a standard value or you just choose by yourself?
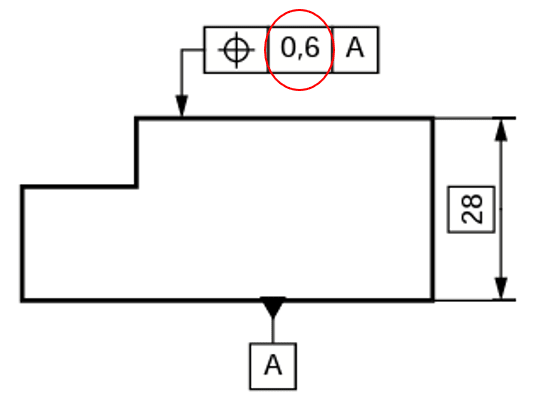
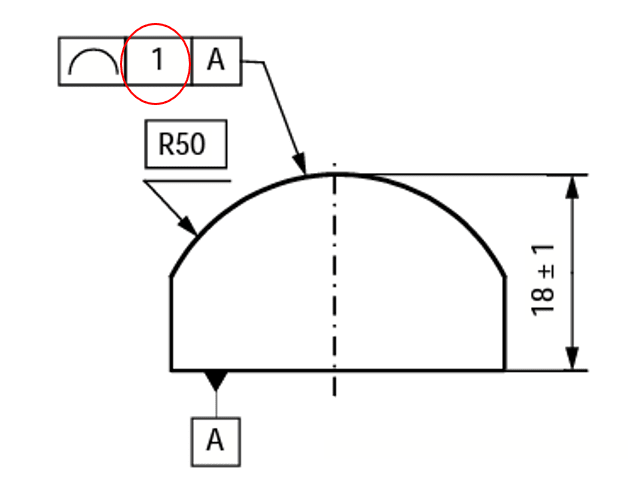
I really appreciate if someone could explain it. I attach some picture with the red marked values. Those value I am intressted to know how to get?
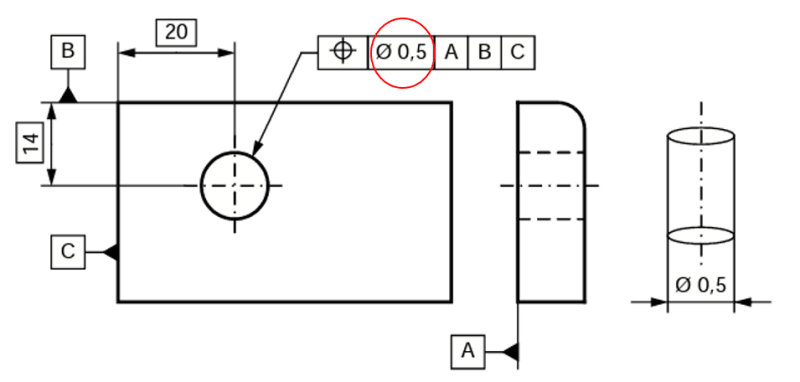
Position_03_thizlw.png


Position_01_sioodn.png


Position_02_m7k8bv.png


Regards
NJ
 
Replies continue below

Recommended for you

In general, the biggest factor to consider is the function of the part. But here are some specific approaches.

There are 4 methods to arriving at a tolerance number:
[ul]
[li]The "make-it-up" method, where the designer either copies a tolerance from a similar part, or looks up a value in some chart/table, or simply guesses[/li]
[li]The "customer-based" method...also called the "top-down" method: if you know how the part fits into a larger assembly, then use the customer's specs to drill down to your tolerance amount[/li]
[li]The "manufacturing-based" method, also called "bottom-up": your knowledge of the capability of the machine or manufacturing method drives the tolerance amount[/li]
[li]The best one is the "effective tolerancing" method, which combines the previous three, juggling all factors until you find a sweet spot for your tolerance amount[/li]
[/ul]


John-Paul Belanger
Certified Sr. GD&T Professional
Geometric Learning Systems
 
"Tolerance" is a verb - the amount of variation you will tolerate. As JP mentions, there are multiple motivations for which that tolerance for variation can be determined.

1) Peer pressure. That's normally the source of "make it up" and typical "manufacturing-based" This is done to get along with others, acceding to what they feel is an acceptable value.

2) Cost pressure. This is the one that is most often claimed under "manufacturing-based" to make the tolerance really large to allow for the worst manufacturing methods to be used. This works great, often forcing the design to have extra degrees of freedom that will then require extra work in the assembly stages to produce adequate fits and alignments, include hand re-work with files and grinders to custom fit the parts. Often these costs are not considered when only the piece-part costs are.

3) Engineering design. This takes into account the entire process in order to minimize design sensitivity to variations so that tolerances can be less sensitive to manufacturing methods. The entire design is evaluated for the cost of the complexity, the cost of limiting variation, the cost of assembly, the cost of maintenance, and the cost of maintaining strength and deflection limits that are part of the functioning of the entire design.

Peer pressure and cost pressure are the most common; anyone who says "Put some GD&T on the drawing" isn't doing any engineering.
 
Thanks JP and 3DDave for your valuable feedback.

Regards
NJ
 
Position tolerance values come from a few possible places:
1) For clearance bolt holes, it's all about the difference in diameter of the fastener and hole. The general goal is to get the fastener to assemble without rubbing the inside of the holes or distorting either component. As a rough answer, I typically take that tolerance and put half of it on the hole of each part. There are more mathematically correct methods but for very small production quantities, the rough answer works.
2) For alignment features (bearing bores, dowel pins, etc), the tolerance comes from the stack-up of error for all of the features so that the final gearing or bearings are within allowable limits for misalignment.
3) If you know the manufacturing method for the feature, you may specify a tolerance that the method is known to produce. However, this ties your design to that manufacturing context and can lead to cost increases over time. This is the least effective solution. That said, it is very important to have an idea of the methods you want and the tolerances it can produce. Sometimes minor adjustments in the design can allow the next cheaper manufacturing method for the component features. Sometimes, spending the extra time to maximize the tolerances won't amount to anything. This is one of those valuable engineering experiences.

David

 
First and foremost you should focus on this consideration: what tolerance value will result in a part that functions as it should?
 
Status
Not open for further replies.

Part and Inventory Search

Sponsor