jnelson33
Mechanical
- Mar 7, 2018
- 51
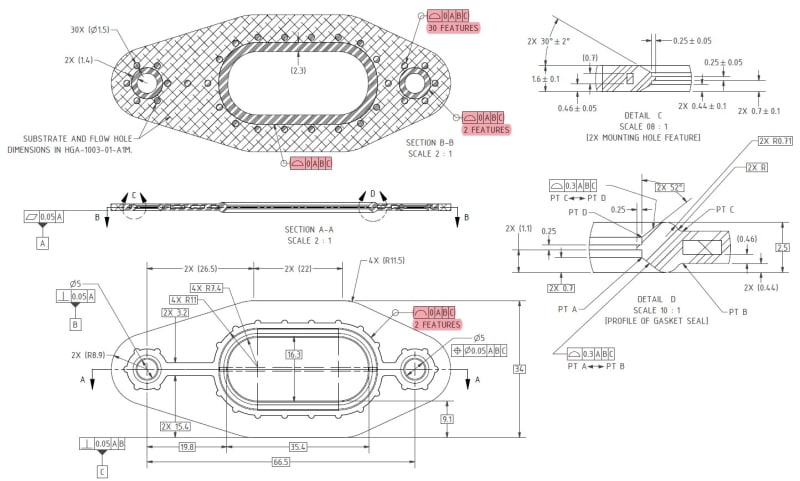
Hello everyone! It has been a while since posting here, but I need help outside of the ASME Y14.5 book.
First and foremost, ASME Y14.5 R2009 or R2018 is being considered, but R2009 is favored because of the cleaner dimensions (title block tolerances still permissible).
This gasket will be produced overseas, not in the USA.
Attached are some images that show this gasket.
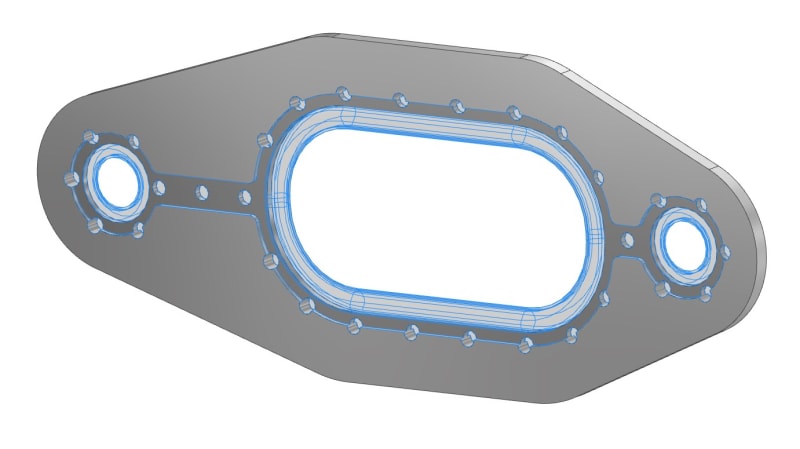
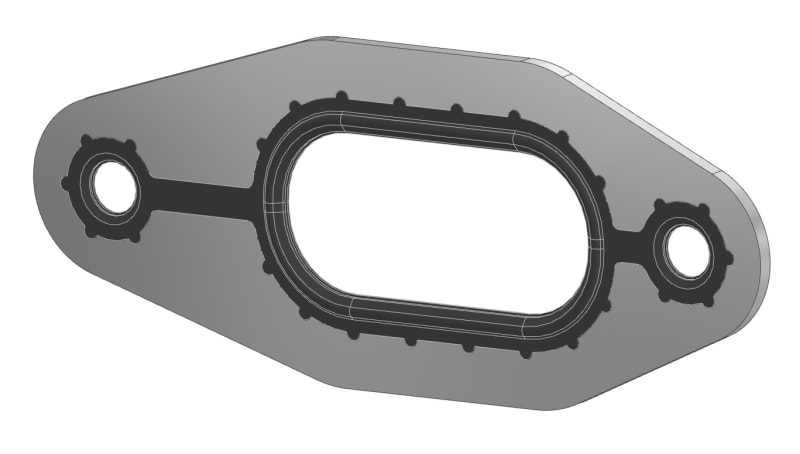
We are ordering the entire gasket, so my thinking is to dimension the final part.
However, if the metal gasket substrate is technically critical to the entire part...
So I'm also wondering, "Do I need to dimension the sheet metal substrate to accurately pierce that?"
Again we're purchasing the completed gasket, so that feels dumb overall.
Does anyone have experience dimensioning a part like this?
I'd prefer to add three datums, critical basic dims and apply profile all over, but that seems ridiculous for this type of part (cost is less than $5).
Thanks!
First and foremost, ASME Y14.5 R2009 or R2018 is being considered, but R2009 is favored because of the cleaner dimensions (title block tolerances still permissible).
This gasket will be produced overseas, not in the USA.
Attached are some images that show this gasket.


We are ordering the entire gasket, so my thinking is to dimension the final part.
However, if the metal gasket substrate is technically critical to the entire part...
So I'm also wondering, "Do I need to dimension the sheet metal substrate to accurately pierce that?"
Again we're purchasing the completed gasket, so that feels dumb overall.
Does anyone have experience dimensioning a part like this?
I'd prefer to add three datums, critical basic dims and apply profile all over, but that seems ridiculous for this type of part (cost is less than $5).
Thanks!

