Mitchapalooza88
Industrial
Hello all,
I have an interesting situation that I will try to simplify.
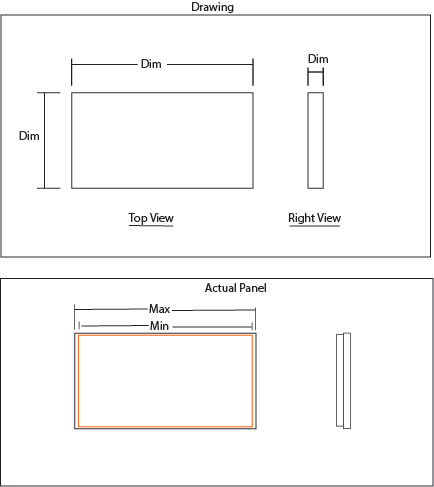
In the picture below I have a simple example of what would be a panel. There is a length, width, and thickness dimension. Each dimension has a tolerance. The top box is what our drawing looks like.
The bottom box is how the panel actually looks when it is manufactured because it is two materials bonded together with each different tolerances of their own.
The question would be, what is the proper method for measuring the width of the panel from a quality standpoint? Would the maximum tolerance be taken from the larger step and the min tolerance be taken from the smaller step in the panel?
In my opinion since it is in the top view, it would be the outermost dimensions that have to meet the tolerance. Or the profile of the panel. There are no perpendicular callout or anything saying the edges have to be 90 degrees.
If this is confusing I can try to explain more. Its a tricky thing to convey.

