Continue to Site

Eng-Tips is the largest engineering community on the Internet

Intelligent Work Forums for Engineering Professionals

  • Congratulations KootK on being selected by the Eng-Tips community for having the most helpful posts in the forums last week. Way to Go!

Measuring System Improvement

Status
Not open for further replies.

Carlos337

Mechanical
Sep 30, 2021
2
Hi all,

Can I improve the performance of my measuring system by increasing the number of measurements taken for any given part?

I ran a Gage R&R with 3 operators, 10 parts and 10 replicates. The %Tolerance was 43%, so pretty crap... However, it seems to me that if I take more than one measurement per part, the performance of my measurement system should increase. I mean, if I take 30+ measurements per part and the error is normally distributed, the sample mean should be close to the true mean (Central Theorem Limit). Is this approach correct?

Also, if by taking more measurements I can improve the performance of my system, how do I determine the number of measurements necessary to bring my %Tolerance from 43% to a more acceptable number (<15%)?

Are there any other approaches to improving the measuring system performance?

As you might have noticed, I am pretty new to QC and Statistics so please keep that in mind when providing an answer.

Many thanks.
 
Replies continue below

Recommended for you

Maybe do a better job of calibration? Otherwise, don't you have the possibility of high certainty of an erroneous value?

Alternately, you fire or retrain one or more of the operators. It seems to me that such a large tolerance for a measurement that does require some level of finesse would suggest that training, or retention thereof, was pretty crap.

Don't forget that for something like this, training IS part of the "system"

TTFN (ta ta for now)
I can do absolutely anything. I'm an expert! faq731-376 forum1529 Entire Forum list
 
Hello IRstuff. Thanks for your reply.

A little bit of background may help.

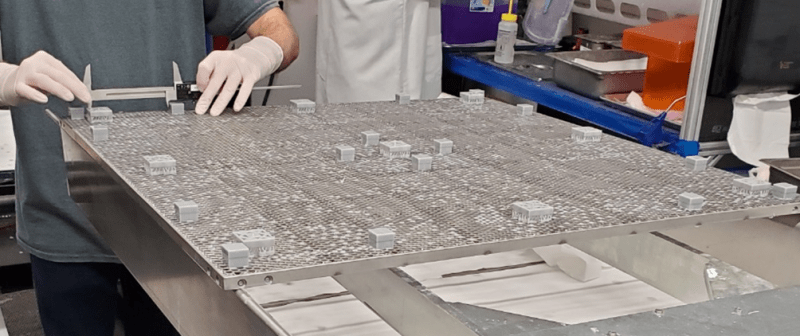
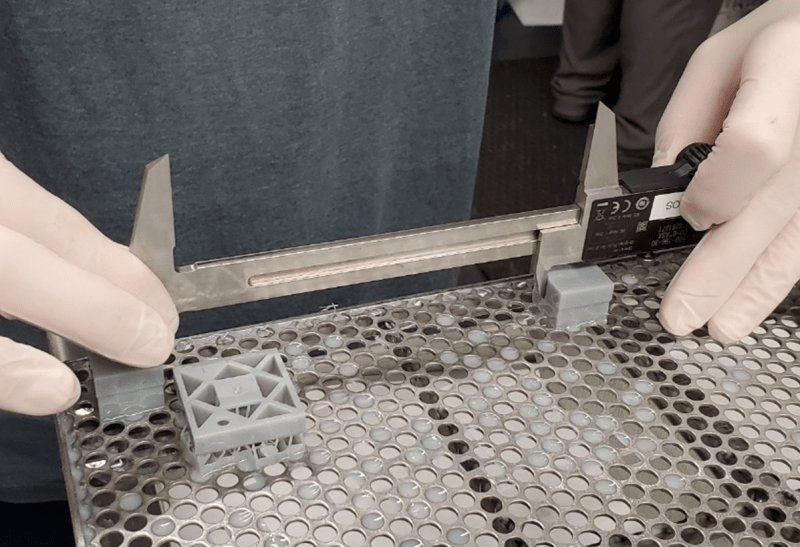
I am trying to measure the distance between parts 3D printed on a platform. The nominal value is 135mm and I am using Mitutoyo calipers. I want to know if the spacing is consistent across the build area on both X and Y axes.
img1_vtgibf.png

img2_bfcuxs.png


These are the results of my GRR. Notice the repeatability and Reproducibility are pretty even.
img3_qwmgjo.png


So if I understand it correctly, that 42.76% is true for a single measurement. But as I increase the number of measurements, the average of those measurements should approach the true (unknown) value.
Is that a correct assumption?

Thanks.
 
Interested to see what others say but my first gut is it sounds like you're trying to analyze QC operator efficiency and you've got too many variables on your plate. Couple things to note.

1.) Make sure the process is parametric. Central limit theorem works on parametric systems. If you have a non-parametric process then you can't use that logic. In practical terms; if you have operators throwing out bad pieces and reporting all of the good pieces it will throw off the distribution. And it may not be the QC operators throwing out bad pieces, in process inspection by manufacturing, sorting, or reworking (a good thing mind you) may be the source of statistics error. Wilcoxon Analysis is good if you're not using a parametric system.

2.) If trying to determine the difference efficiency of operators then remove the variation in parts and up your sample count. Everyone should measure 1 piece and there needs to be a statistically acceptable (30+) number of measurements.

3.) Similar to 2.), break out the calipers if possible. One operator should measure one distance to see how the calipers may move.

4.) Remember statistics is just an output to give a data point for reasoning but your organization is the final decision maker. Take in to consideration the tolerance of what is being measured and what is required. If you're measuring rough cut to +/- 1" and your operator is at +/-1/2" for the 6 standard deviation then you're just fine. Don't try to tie your hands further by giving land surveyors a set of micrometers.
 
least squares is a poor way to get there, wherever "there" is. You have to quadruple the number to get a factor of 2 improvement. Quadrupling the test time is NOT a process improvement

Not sure how you configured your study, but the % contribution doesn't look that bad, so your % tolerance is essentially saying you might be trying to do something too difficult for your process, as opposed to having a bad process. The bigger question is whether your measurements are consistent with industry standards, as opposed to whatever your end goal is. If they are, then you need to find a better way to achieve your goal, as opposed to flogging your operators to do better measurements that might be not physically possible in your process.

TTFN (ta ta for now)
I can do absolutely anything. I'm an expert! faq731-376 forum1529 Entire Forum list
 
A good place to start would be to not use the worst possible tool for what you are trying to do given what you are measuring.
 
First try with a go/not-go gauge.

Regards
 
Status
Not open for further replies.

Part and Inventory Search

Sponsor