bryansonnier
Mechanical
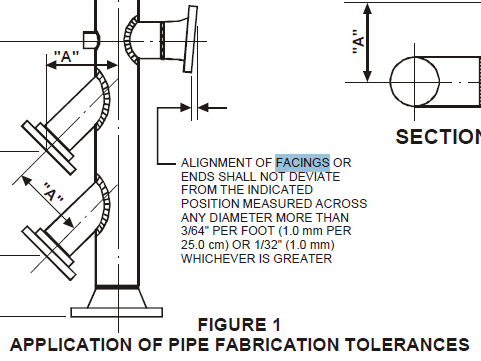
For "Alignment of facings or ends" it states that they "shall not deviate from the indicated position measured across any diameter more than 3/64" per foot or 1/32 whichever is greater."
My question is does this apply to the raised face section or the OD of the flange. For instance, the raised face diameter of a 2" CL1500 flange is 3.62" and the flange OD is 8.5". A 1/32" deviation based on the raised face is gives a tolerance of +/- 0.49 degrees but based on the flange OD is +/- 0.22 degrees. Both of these are very tight tolerances but the OD is extremely tight.
The image shows what looks like the flange OD but may be a flat faced flange as the facing of a raised face flange is the raised face i would assume.

