Continue to Site

Eng-Tips is the largest engineering community on the Internet

Intelligent Work Forums for Engineering Professionals

  • Congratulations waross on being selected by the Eng-Tips community for having the most helpful posts in the forums last week. Way to Go!

Strategy for multiple curves at corner 4

Status
Not open for further replies.

AleksanderK

Electrical
Aug 20, 2015
15
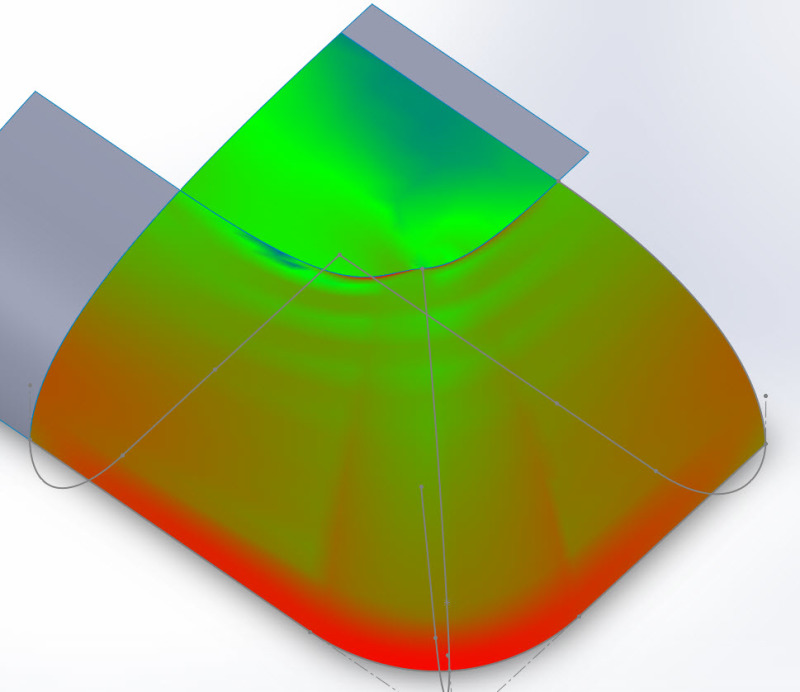
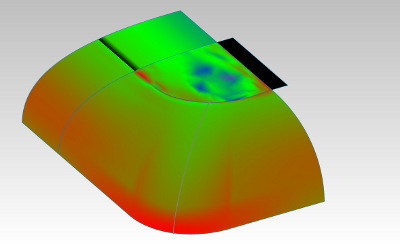
Can anyone suggest a strategy for getting good curvature bringing these curves together? Every time I add a hard constraint (such as a guide curve for a loft, or Direction 2 for a boundary), the surfaces become wrinkled.

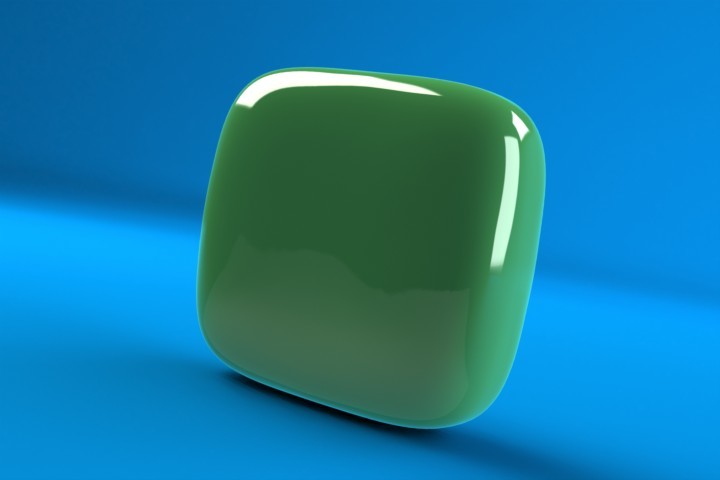
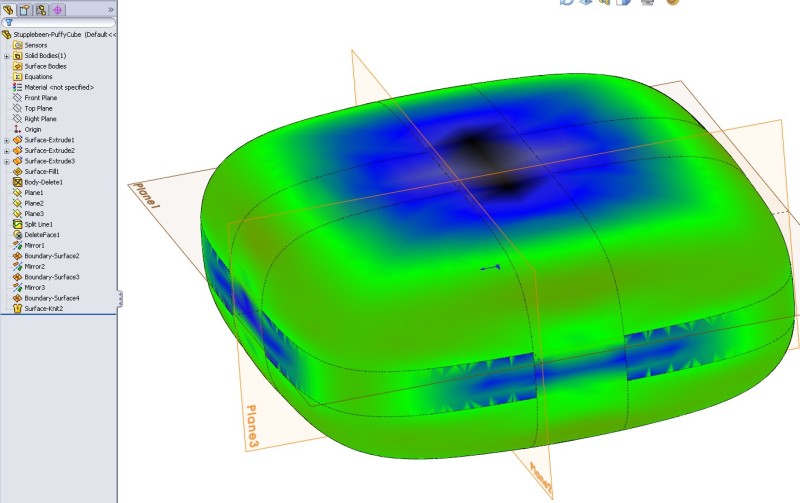
The whole part is a just a rectilinear box with curved edges and a slightly curved top, and flat bottom, and this model is one corner of it.

The part will be injection molded.

I've put many hours into this, including training (instructor couldn't figure it out), tutorials, books, so I think I have to ask for help now.
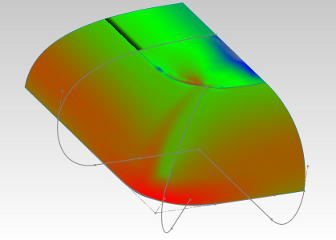
cornerproblem.poorsolution_ghzp7k.png


Replies continue below

Recommended for you

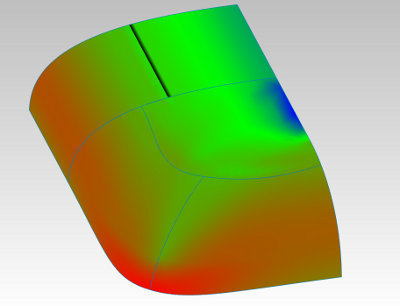
well that would make a difference then... didn't realize that was a Constraint. That Wonky area makes it tough to get a clean curvature.

curvature2_wmrsut.jpg


Scott Baugh, CSWP [pc2]
Gryphon Environmental
"If it's not broke, Don't fix it!"
faq731-376
 
@SBaugh Yup, that's the stuff I keep getting. Isn't this a common problem?

A little clarification just in case: the wonky area is a fill, the final portion left over after doing the main portions of the corner. It is not a constraint. The constraints are defined by the sketches 'cross top', 'long top', 'corner top', and 'corner plan.' It is acceptable to not follow 'corner plan' precisely, but the surfaces must not go outside the corner plan.

I have achieved an excellent top (the wonky area) by sweeping 'long top' along 'cross top' but then it becomes a hard constraint (after trimming it) for the main parts of the corner. This was the approach used in the iphone tutorial, but the iphone has only a simple corner (same profile all the way around the corner).
 
Yes, unfortunately for you we are on 15. But let me try to walk you through it. The basics are that I did mine with one lofted surface. I used you geometry to generate my curves and obviously had to make some assumptions.

[ol 1]
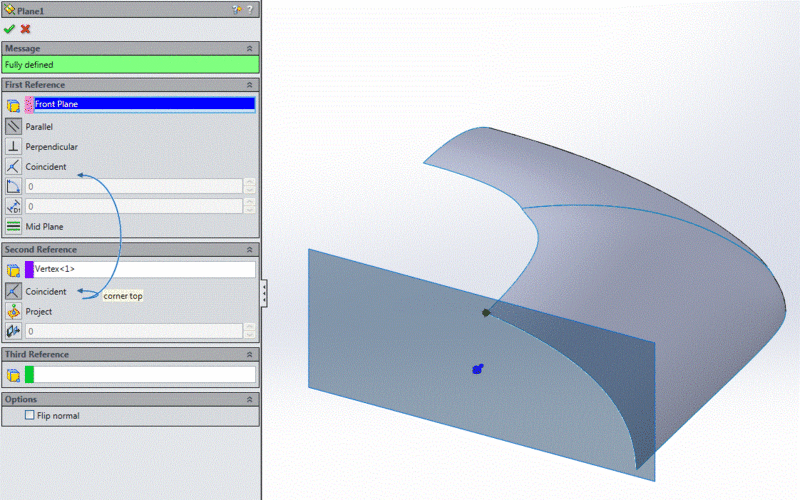
[li]create Plane1, parallel to your Front Plane and through the point highlighted[/li]
1_jln3lg.gif


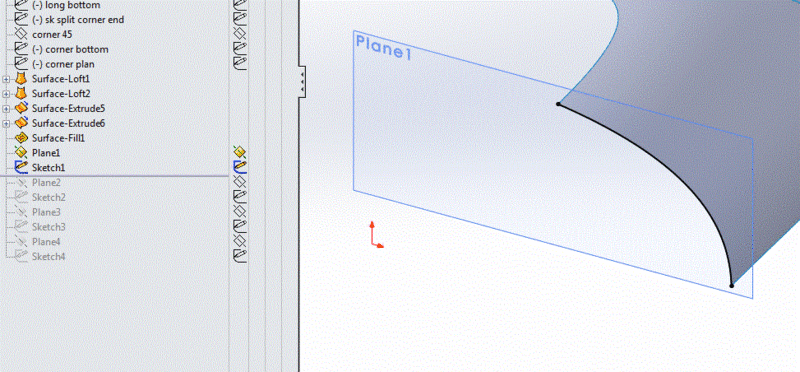
[li]create Sketch1 on Plane1 using “convert edge” on your Surface-Loft2 profile[/li]
2_a93k6x.gif


[li]create Plane 2, which is actually just a 0.0 distance offset of your Right Plane; only did this for continuity of the process and to keep the new stuff in one area[/li]
[li]create Sketch2 on Plane2, done same as Sketch 1 (see step 2)[/li]
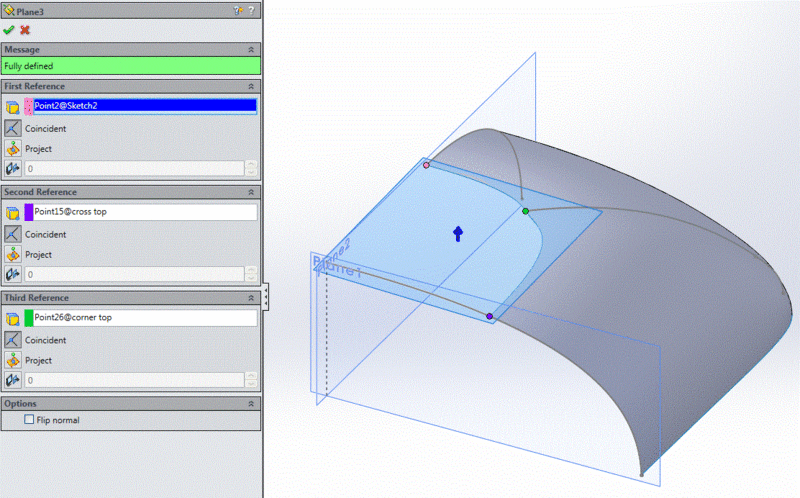
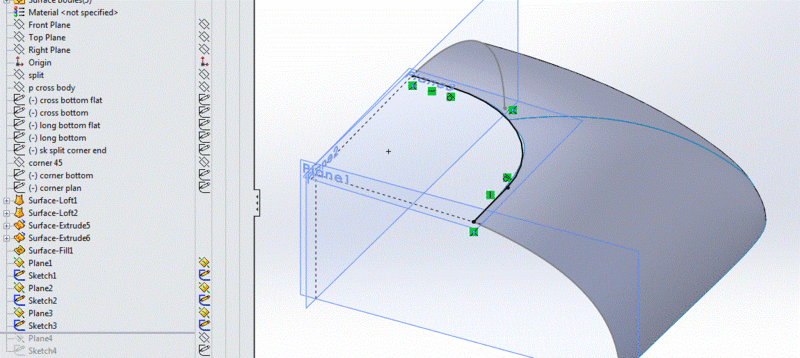
[li]create Plane3 using the three highlighted points; assumption being that you want your surface to go through these three points only without the “wonk”[/li]
5_owqgkl.gif


[li]create Sketch 3 with two lines from the end upper endpoints of Sketch1 & 2 and a tangent arc that is also coincident with the end of the line that is the intersection between your Surface-Loft1 & 2, this is also one of the same points used to create Plane3[/li]
6_pfqnc1.gif


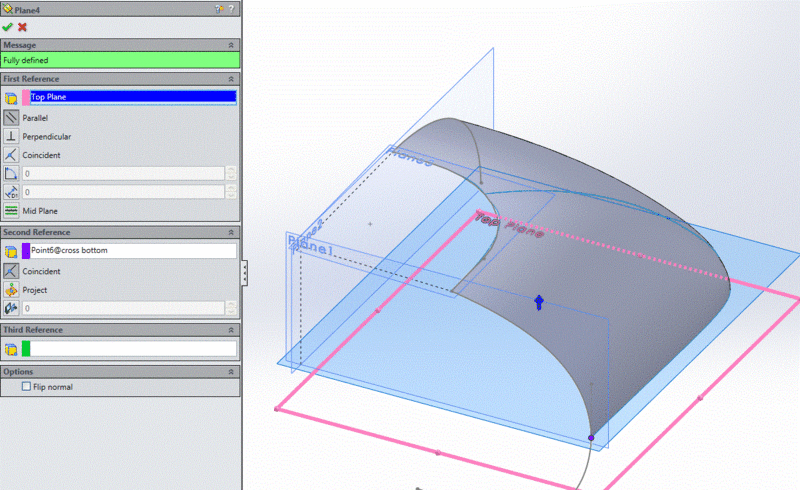
[li]create Plane4, parallel to your Top Plane and through the point highlighted[/li]
7_uwkypi.gif


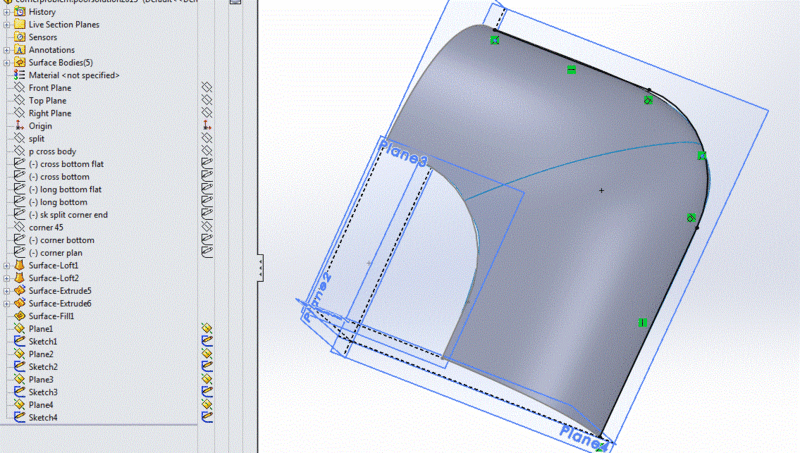
[li]create Sketch4, using the same idea as Sketch3 (see step 6)[/li]
8_rfzxag.gif


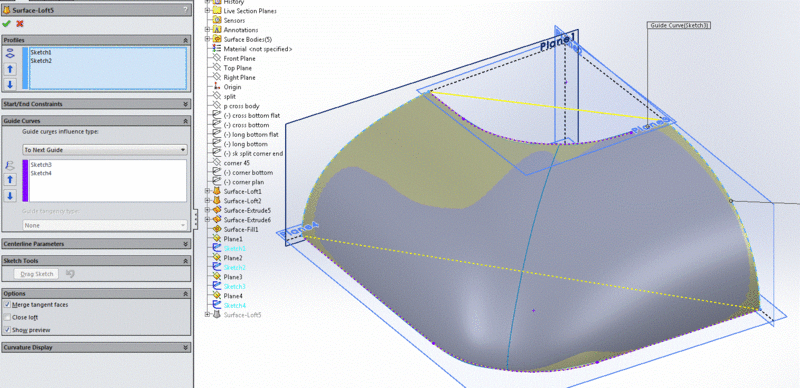
[li]create a Surface-Loft using Sketch1 & 2 as the profile curves, and Sketch3 & 4 as the guide curves[/li]
9_ctrdr6.gif


[li]wrap it up and put a bow on it[/li][/ol]
big_grin_nuuou4.jpg
 
@djhurayt Wow, that is a very impressive answer! I was expected a few short bullets. Thanks a million for taking so much time. It's after midnight here, I can't go on, but I will follow this guide closely tomorrow morning and let you know how it goes.

Many thanks to all for participating in my puzzle!
 
@djhurayt Thanks again. I've followed the steps, see pic below. You haven't shown your curvature; is it better?

The profile on the 45 degree plane is meant to flatten the corner. To get that effect, tangency controls are needed there. Loft only offers tangency controls on start and end profiles, so I also modified your steps to make two lofts, with a similar outcome.

A stellar effort, though, and much appreciated!

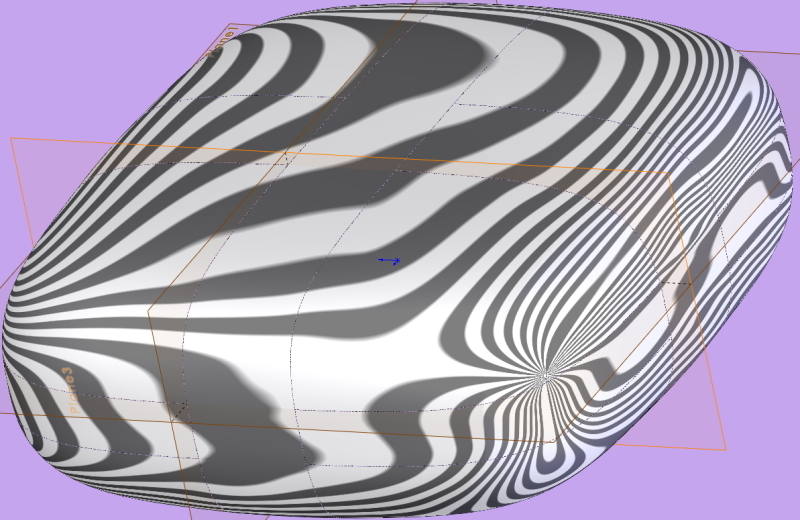
cornerproblem.poorsolution.djhurayt.sm_zlmcet.jpg
 
Here's what I've decided to run with for this shape:
1. Concede that secondary constraints (boundary dir2 and loft guides) sometimes cause wrinkles.

2. In lieu of secondary constraints, use tangency controls.

3. Make two lofts, to get the tangency controls at the 45 degrees sketch.

4. Assume that there may be un-smoothness at the unconstrained edges, and be prepared to trim it. In this case, the lower edges were good, but the upper edges showed some strange curvature within 0.3mm of the edge, which would be fed into the next surface if not trimmed back to a clean portion of the surface.

5. If a secondary constraint is required (for example, the subsequent surfaces), then use the above technique to get the edges close, then add the constraint. SW must then only make minor tweaks to force the alignment.

And voila:
cornerproblem.poorsolution3.sm_ksk1bk.jpg


Many sincere thanks to all who read and thought about this.
 
@rstupplebeen Thanks very much for that, it's a clear demonstration of the 'trim the cruddy edges' technique, which does not seem to get as much press as it should. It's also reassurance that it has to be done sometimes; I was concerned that I might be hacking to compensate for lack of skill.
 
Status
Not open for further replies.

Part and Inventory Search

Sponsor