Alright, time to give this a whirl. An empty version of the database is attached to this post. What follows will be the beginning of what will hopefully become the instruction manual. I'll be adding to it piecemeal as time allows and issues crop up.
1.0 Locating the database file and your root folder
You can put the database file anywhere that you like. All of your PDF files must be located within a single root folder that you will later specify within the database. Within the root folder, you can organize your files as you see fit. If you're like me, you've got most of your PDF files already stored in folders that represent and existing filing system (steel, concrete, seismic, etc). If that's the case, just copy all of those folders into the root folder.
On my computer, I've placed both the root folder and the database file within folders that are synchronized with my Dropbox account. This allows me to use the same system at home and at work. The Dropbox business is entirely optional however.
2.0 File naming and how the system finds your PDF files
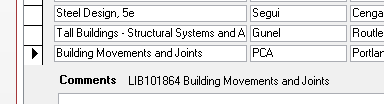
The system will automatically rename all of your files according to the following nomenclature: [LIB] + [SPACE} + [Six Digit Number] + [User specified document title]. You can't have colons in the file name. This trips me up from time to time. Replace all colons with dashes. The system does not contain your files. Neither does it even contain links to your files.
The system knows your files simply by the six digit library tag (snippet above). When you click the "link" button to have a file displayed, the system hunts through your root folder and all of its sub folders until it finds that six digit tag. Then the system opens the associated file. While a bit odd, this setup has one huge advantage. You can reorganize your files within the root folder without ever worrying that the system will lose track of them. The system never had them tracked in the first place.
3.0 Setting the root folder
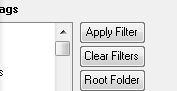
The system needs to know where you've chosen to keep your root folder. Click the root folder button, navigate to your root folder, and verify that the system has recorded it directly. You only need to do this once.
4.0 Adding your first file
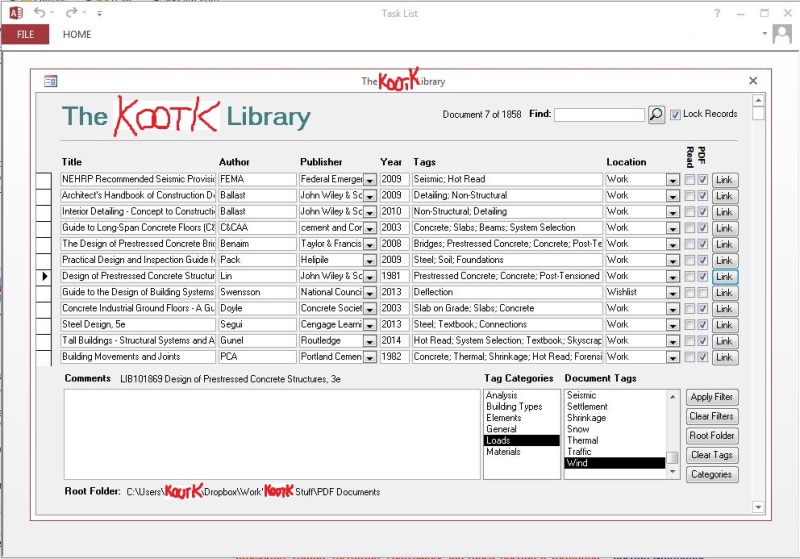
The system comes with one document record already loaded (AISC 13th). The reason for this is that the system has some issues when it's entirely empty. Once you have other records entered into the system, you can delete this one. Note that the record is not associated with a PDF. That's because I use the system to log both PDF documents and hard copy documents. For me, the AISC manual is a hard copy document.
4.1 You can fetch a PDF document from anywhere but, to get the most of out of the example, start with a new PDF on your desktop.
4.2 Ideally, the file name would be less than ideal so that the system can modify it for your.
4.3 Start a new record and click the "Link" button at the end of it. A file chose dialog box will open.
4.4 Navigate to and select your file. If your file is not located within the root folder sub directory system, the system will ask you if you'd like to move it there. Say yes.
4.5 A folder chose dialog will open and allow you to navigate to the folder within the root directory where you would like to store the document.
4.6 The system will now have moved your document and renamed it [LIBXXXXXX ORIGINAL FILE NAME]. I has also guessed that you may want the title of the document to be whatever the file name was. That's usually a good place to start and sometimes saves some editing effort.
4.7 Adjust the name of the document within the system. Don't use any colons and remove ".PDF" from the name. Once you've edited the title, the system will automatically rename the file to reflect that.
4.8 Fill out the rest of the fields as you see fit and save the record. You can save the record by either moving to another record, moving to a control outside the list or, most conventionally, by clicking on the little pencil thing at the left hand side of the record.
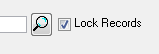
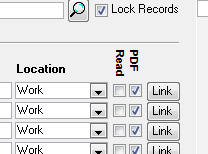
5.0 The Lock field
Whenever you save or leave a record, the system will automatically "lock" it. When it's locked, you can't mess with the record until you go to that record and uncheck the "lock" field. This will annoy the crap out of your initially. Trust me though, you want it this way. It keeps you from messing up the integrity of the data that you've worked hard to assemble.
6.0 The Publisher field
The combo box for this field will contain all of the publishers that you've previously entered as options. This way "John Wiley and Sons" can always be precisely "John Wiley and Sons" and never anything else.
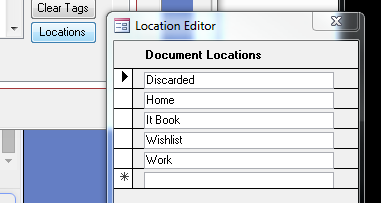
7.0 The "Location" field
I use this field to indicate where the document is. It's mostly intended for physical documents. If it's a PDF, I chose WORK. If it's at home, HOME. If it's real book stored at work, WORK. If I loaned it to my colleague Kevin, then I type KEVIN. The choose box runs off a predefined list that you can edit as shown below. You're not limited to the list though so you can enter one off's like "KEVIN" without a bunch of overhead.
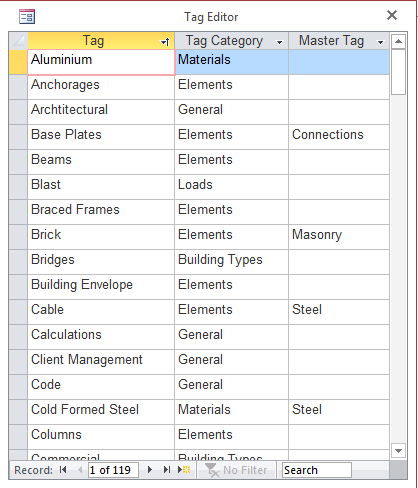
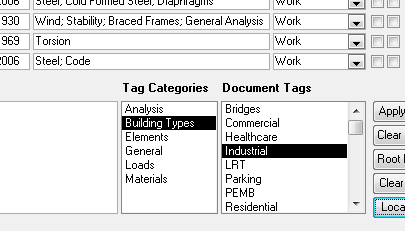
8.0 The "Tags" field
This is the good stuff. And the important stuff. We'll talk about how you set up your tag options later. For now, we'll just look at how you add them to a record.
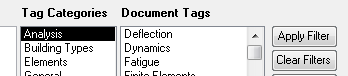
8.1 Go to the "Tag Categories" list box and select the category that contains the tag that your interested in. "Materials" maybe. Select material and the "Tags" list will repopulate accordingly.
8.2 Find the tag that you want in the "Tags" list and double click it. It will be added to your record. As as many tags as you care to this way. Double clicking a tag that already has been added will cause that same tag to be deleted.
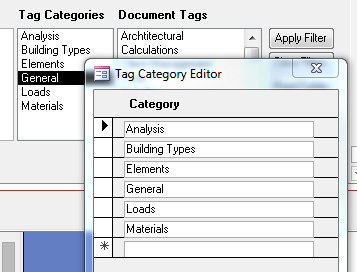
9.0 Setting up your custom tagging system
The system comes pre-loaded with my tagging system. If your serious about this, you'll want to ditch it and spend some time coming up with your own system that work how you need it to.
9.1 Right click over the "Tag Categories" list box and, in the context menu that appears, select "Edit List Items". In the editor that pops up, set up your tag categories as you like. Note that you cannot delete a category that contains tags. You can only edit it. To delete a populated category, you need to delete or move the tags that it contains.
9.2 Right click over the "Tags" list box and, in the context menu that appears, select "Edit List Items". In the editor that pops up, set up your tags as you like. Each tag must be assigned to a pre-existing category. Optionally, each tag can have a "Parent Tag". That's best explained through example. I have a tag that is "base plates". It's parent tag is "connections". If I tag a document with "base plates", I'll get "connections" too automatically. No biggie, just a minor time saver.
10.0 Searching and filtering your library
This is what you came for. Time for some cake.
10.1 Searching by tags. Go to the "Document Tags" list box at the bottom right and highlight the tag that you want to search by. Then click the "Apply Filter" button. The document list will be pared down to just the documents that have been tagged with the tag that you selected. You can continue to filter by additional tags. The filtering is cumulative. If you wanted to look at concrete shear walls in seismic zones, you might filter as follows: SHEAR WALLS --> CONCRETE --> SEISMIC. In my system, this would get me from 2000 documents to a handful in a hurry.
10.2 Searching via the "Search" button. Type something in the text box and click the magnifying glass button. The search algorithm will search all fields of all records and return the documents that contain your search term. In particular, note that the "Comments" field will be searched. This can be powerful if you enter your document comments with a strategic eye towards later retrieval. I'll it use to:
- Type in the name of the person who led me to the document.
- Record the alternate versions of the name of the document (NIST 1257 vs Raft Foundations etc).
- I might indicate that I found the document posted here on eng-tips.
- Most importantly, I'll include a few terms that reflect why I thought the document was important.
10.3 Native Access search and filter functions. Access can search and filter in dozens of handy ways. There are too many to describe here. Right click over any field and the context menu will be pretty self explanatory.
10.4 Combination searches. You can use methods 10.1, 10.2, and 10.3 concurrently as part of the same search. For example, you could filter tags as SHEAR WALLS --> CONCRETE --> SEISMIC and then perform a search button hunt for "Portland" to further narrow the field to a document that you know was authored by the Portland Cement Association. You can use the various methods in any order.
10.5 Clearing all filters. No matter which search method you've used, you'll eventually want to get back to the full list of documents. To do this, click the "Clear Filters" button at the bottom right.
10.6 Demonstration. In my next post, I'll upload a version of the system that contains a couple thousand records. Use this to futz around with the search functions and see if this is something that would work for you. Obviously, you won't actually have all of the linked PDF files so you won't be able to access those.
11.0 Retrieving your files for viewing
Click on the "Link" button beside the file that you would like to view. The system will track it down and display it using your computers default PDF viewing software.
I like to debate structural engineering theory -- a lot. If I challenge you on something, know that I'm doing so because I respect your opinion enough to either change it or adopt it.
")