Eng-Tips is the largest engineering community on the Internet

Intelligent Work Forums for Engineering Professionals

  • Congratulations waross on being selected by the Tek-Tips community for having the most helpful posts in the forums last week. Way to Go!

Structure of Honeycomb in CATIA v5 step-by-step? 1

Status
Not open for further replies.

zgrgrz

Aerospace
Oct 26, 2015
8
0
0
GB
Hello guys :)

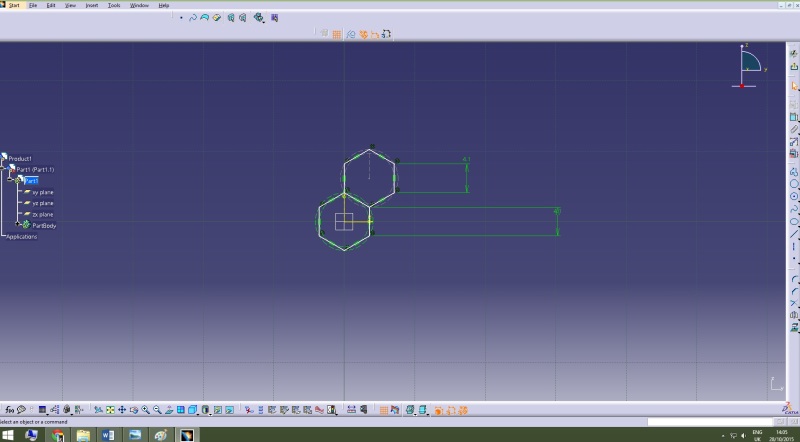
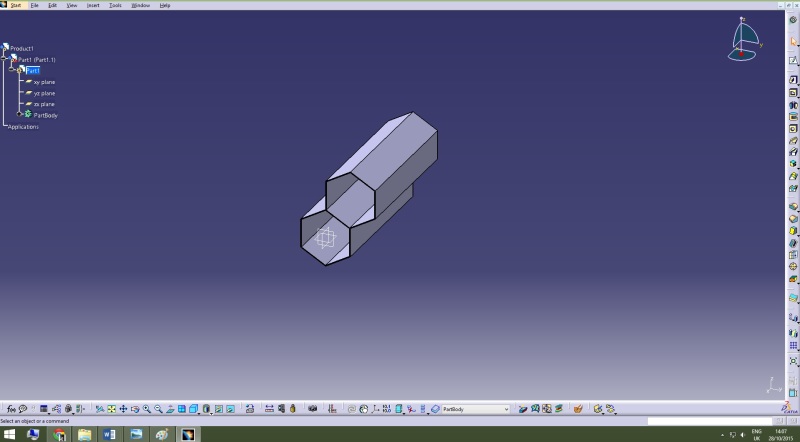
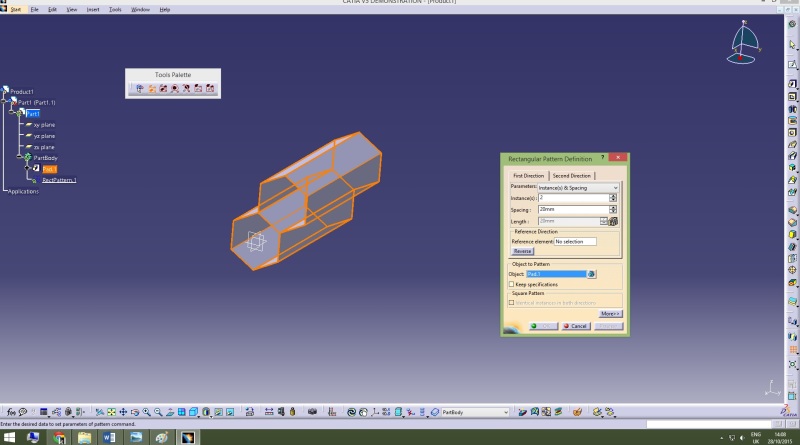
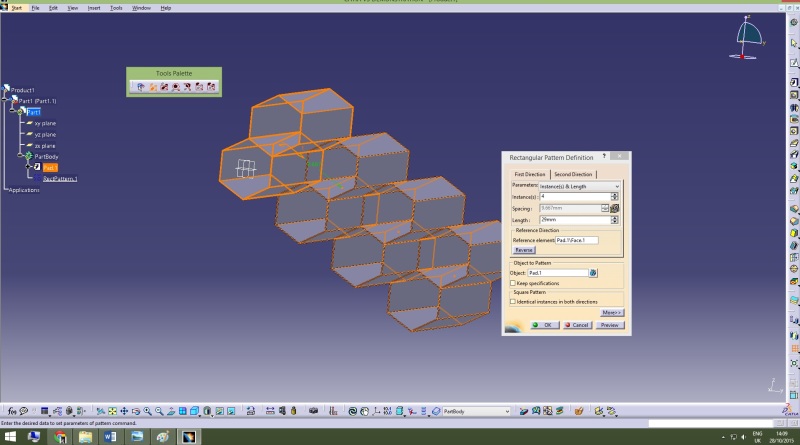
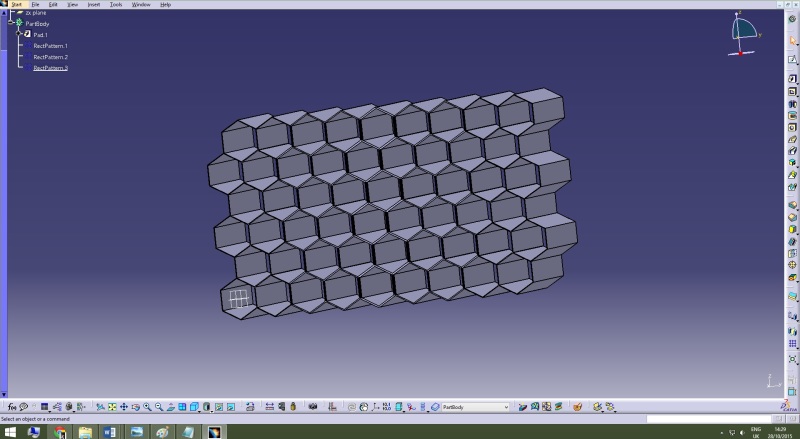
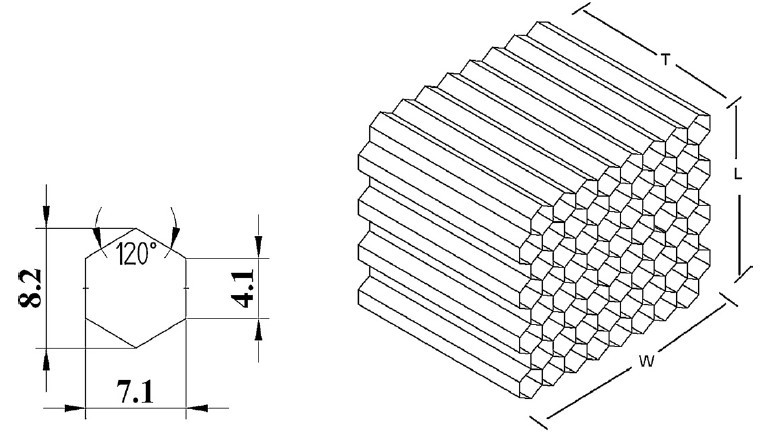
Could anyone help me or explain how to create Honeycomb structure in CATIA? I need to create a big honeycomb but always I can't go further than few rows. The best idea is to create one honeycomb and copy them but I totally do not know how to do that in CATIA v5, I tried mirror option etc but it does not work well. I attached photo how it should look like. If anyone has any idea please help me :) Thank you in advance!


honeycomb_kxhwru.jpg
 
Replies continue below

Recommended for you

@drewmumaw It does not work, It is easy to do one structure or five but its almost impossible to make more... Like make one big honeycomb! :(
 
Looking closely at the lower-left corner, I see Drew sketched two hexagons for the first pad. He was able to make a Rectangular Pattern in the Horizontal and Vertical directions. That's pretty clever!

To get the same result, I would have made a single hexagon sketch, and patterned it in the Horizontal and 60° directions to get the bottom two rows, and then add a second pattern to go vertical for the other rows.

 
Thank you guys for you help but I still can't do that. I posted few pictures step-by-step how I am doing this and when I have a problem but someone deleted this and change my post (Weird) and my password has been changed, I do not know what happened :O
 
@grzenio23
Since jackk and I were both able to create a hex pattern, I think this is an error on your side (along with the eng-tips.com site issues that you're experiencing).

Here's a few tips and things to check:
[ul]
[li]Remember to only sketch the outline of the hexes in your sketch.[/li]
[li]Fully constrain your sketch (the geometry should turn green)[/li]
[li]When creating the pad, use the "thick" option if you want a solid result with thickness.[/li]
[li]When uploading your step-by-step images to this site use the image icon with the plus symbol above the input text box.[/li]
[/ul]

Drew Mumaw
 
@drewmumaw
Thank you for your message. Yes I know that error is on my side. I posted how I am doing this step-by-step and the 4th step is my main problem, do not know how to do that equally and symmetrically like you guys did, if you have some time please have a look :)
Thank you in advance!
1_g80a8g.jpg
2_qgtgci.jpg
3_udnxar.jpg
4_mhxaey.jpg
 
@drewmumaw
Thank you for your message. I did it with reference direction but is there any chance to leave all walls with the same thickness?
5_uyu74m.jpg
 
@drewmumaw Thank you but I did this. I mean, thickness when I am doing Rectangularn Pattern, is it possible to make "new honeycombs" stick to "old honeycombs" perfectly? With no gap or double-walls etc? :)
 
@drewmumaw I am designing just Honeycomb Cores, I have to compare different materials etc to make it cheap to produce, good to work :D Its part of my coursework, have to write 5000 words report about Honeycomb Cores
 
Status
Not open for further replies.
Back
Top