Continue to Site

Eng-Tips is the largest engineering community on the Internet

Intelligent Work Forums for Engineering Professionals

  • Congratulations KootK on being selected by the Eng-Tips community for having the most helpful posts in the forums last week. Way to Go!

Unusual residential structure response 4

Status
Not open for further replies.

EDB9

Structural
May 17, 2019
63
Hello,

I am working with a warranty department for a major home builder. A residence that took occupancy last year is a large three story residence with a slab on grade and turndowns around the perimeter. The lot was a cut lot and the slab bears fully on residual soil. We had no involvement with the initial site testing and I have a one pager that says it’s good. Well I’m questioning that entirely because the house has thousands of nail pops, drywall separations, molding separations, and they increase in numbers daily. A brand new house should not do this! Across the street is another development being cleared and grubbed immediately adjacent, and goes for probably about a mile. I had HABs conducted and found extremely soft blow counts, from 1 to 4 on the front left side but as you went to the rear left side, the counts were mostly acceptable >8. Lab testing indicated mostly ML, MH, and SM. All samples were damp or wet with no groundwater table found at 10’. Organics are present in some samples that haven’t been tested yet. It has been a rather wetter season lately so I suspect that’s why the moisture is retaining. I am at a loss of what could truly be causing this. There was information on the subdivision geotech report stating two lots over was a large organics pit that required soil remediation, but that was a fill lot anyways. I did a quick perimeter check to see if I could see any drainage issues or cracks in the slab but it was pouring rain so it was a rushed effort and I was sans umbrella. I couldn’t see the interior slab because of the floor coverings but I would have expected to see something somewhere in the floor tiles if there was differential settlement occurring. Only in the vertically mounted tiles did I see any separation.

Here is a sample picture of the stairs to the next floor up. The blue painters tape are where the homeowner has marked all the spots that have pops, pulls, separations, etc. The landing in the photo is one of two bouncy areas with excessive deflection.
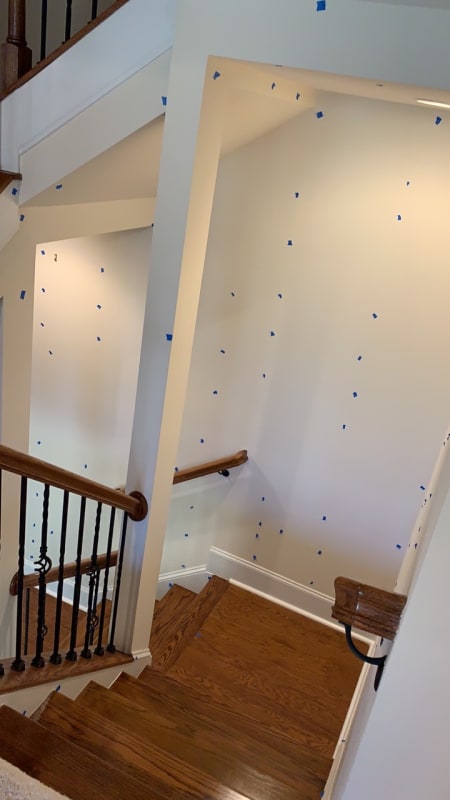
8BC536F0-BA09-469B-9598-0D39A3B43381_rqejy6.jpg


The warranty department made repairs once already this past winter and within a week they all started coming back! So they stopped all repairs until we can fix the source of the issue causing the distress.

Here’s the big question. How do I fix this? I really don’t want to have to bring a drill out and do SPTs but if that’s the only option, then that’s gonna have to be what happens.

Has anyone ever experienced issues like this? If so, what was the issue and fix?
 
Replies continue below

Recommended for you

Glad to see Ron here, one of the most experienced engineers in this group.

Another point. If the 2 x 6's show more distress, that points then to wood shrinkage.
 
This old guy did a little web browsing to find a way to measure wood shrinkage. If one could tell by some measurement when things have stabilized, he can fix the nail situations and be done with it. Apparently 28% moisture is full saturation and the usual testing involves using samples. There may be a final moisture content below which no further shrinkage occurs. Maybe. In any case the material I read so far says use calipers. I'd rather use a micrometer. With studs exposed (??) two "reference points" would be needed for micrometer to do any useful measuring. If not, a machinist's dial indicator mounted for taking periodic readings. Accuracy to one thousands needed. The longest possible dimension between these references would be necessary. A little mental cogitating would come up with a good way to do this. Such as a long screw founded at the bottom of a hole bored in the stud and a plate screwed to the inside surface as reference points. A few of these installed would be not much visibility problem yet on going periodic reference dimensions would help a lot. Leave the head of the screw about an inch of so down and the plate on outside with a hole. A depth type micrometer would do it. Instead of plate, screw a short small pipe nipple into wood. Takes less space on wall, but less measuring length.
 
At the same time as measuring wood shrinkage, use the micrometer to measure dry wall thickness changes. Set a wood screw in the wood and glue a plate with hole to the drywall (non moisture type glue). Should give enough data to resolve when to repair.
 
OG,

I think you’re right on the money here. These recommendations sound relatively simple to perform and we are supposed to have a very dry week, upper 90s, and it may be a good time to check.

I did review the floor plans again this morning. The exterior framing is all 2x6 on turndowns with (2) #4s. Vapor barriers with gravel underlay under the SOG. The amount of moisture that we’re discovering in the soils we’ve collected around the perimeter is too high so that is confirming the moisture issue. The lack of weep holes in the veneer and the low grades swales are likely allowing ponding and seepage, further confirming moisture intrusion. It going to be interesting to see if the two corners that I have the poor soils in have any issues behind the walls. Those are likely the two areas I’m going to recommend they check with the steps you suggested.

It’s gonna be interesting to see what the test results show once I have the data!
 
You might not find long screws to fit this idea. Hardware stores likely have small diameter rods. With the end sharpened to a long point then driven in with a set punch in the bottom of a hole. Likely will stay put assuming wood shrinks still. Will allow smaller diameter hole and less affect on the stud.

Edit:Makes me jealous figuring this out.
 
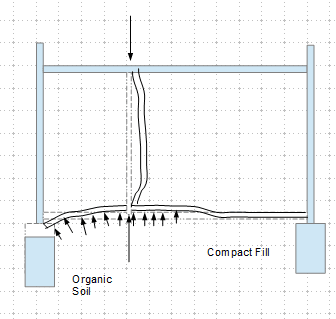
While at this time there may be no effect on things,a vapor barrier under the floor slab can cause problems with flooring and other things. Concrete mix water doesn't soak downwards and also high moisture soil underneath doesn't do much into the floor concrete. Thus outside water is likely little if any effect inside. Inside that mix water only can evaporate upwards. Thus flooring such as tile, linoleum, etc. may come loose due to this if placed too early. One way to check to see if there is water still coming out is a simple test. A clear plastic sheet at least 2 ft. square is laid on the concrete and sealed with tape on all 4 edges. Observe this at least a few days after placed. Water under the sheet will show it is still coming out. In summary outside ground water is not likely involved now or maybe never was.
 
For nail pop out, will it be the case?

image_b0m7rx.png
 
I have been looking up mounts for strain gauges.The simple flat plate with a clamp over the mounting hole used to be common, but on Internet I don't find it. Perhaps retired 13 with his mechanical background can help, rather than diagrams that don't apply here.. Need a simple mount for the sensor leg to penetrate down to measure height.
 
On a positive note, my vendor approved going into take some moisture readings, checking the dimensions on the stud walls, adding some plates to monitor movement, and we’re gonna recheck a bore hole to see if the moisture is ponding still. Next week it’s supposed to be VEEY hot and dry so I’m gonna let it dry out a few days then we’re going in and attempting to confirm moisture is the culprit.

I am now about 99% certain there’s a moisture issue AND an organics issue on the left side. We found organics down to 10’ in two holes below BOF. Another random find, there’s pyrite in the soil too.

I wanted to say thanks to OG for the wonderful advice! I think I have a path to move forward and a relatively cohesive plan to get a solution.
 
Retired13,

This is a cut lot so no fill. So far, I don’t have any reports of different settlement or bulging in the first floor. I do plan to check the levelness in various areas to confirm if things are level or bowing.
 
OG,

I've no experience on settlement monitoring, here is one manufacture that may have something you were talking about. Link. Another one, Link. And a NYDOT article Link
 
Typically with settlement monitoring, I have a survey crew put nails in the foundation and we can take elevations. Then recheck after several months. It’s an efficient way and quite accurate with results. If this wasn’t a residential structure, I’d consider settlement monitoring devises but residential world is a bit different than commercial, which I also work in.
 
I think the beauty of the monitoring device is that it can record the settlement amount at programed date/time, and transfer data to electronic devices that came with database software. It is a worthwhile investment if it can be reused for other projects. Cost-wise could be a wash between survey crew and the monitoring device.
 
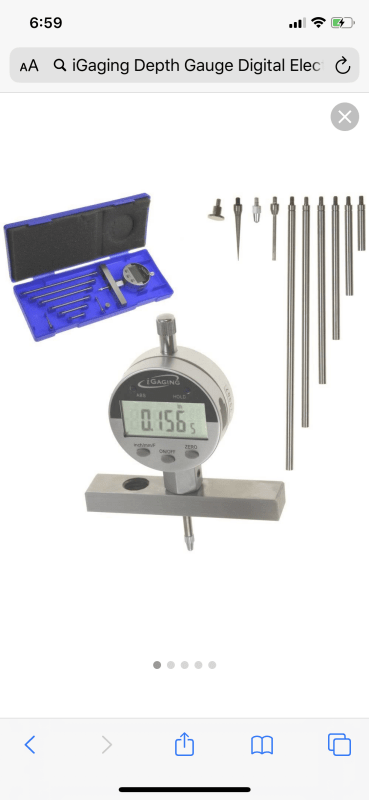
Found it. All we need to do is search for "depth gauge", dial indicator. Penn Tool Co sells what looks oK ,maybe needing interchangeable tips for length variations.
 
That definitely seems like an easy enough way to measure the studs. We’ve got a couple of different tools available I just need to go thru and see what would work best. I know we’ve got calipers, I’m just not sure if we have dial indicators like your sketch but I’ll just expense it and go to the hardware store if need be. I was thinking about the plate concept you mentioned and also looked for literature about it, but didn’t find anything either. However, I do believe I could get some shim packs, measure them, and place them on some of the studs as well. Then set an interval to verify any movement or change in orientation.
 
OG,

951DF2AD-DE08-46C4-A535-DF64FF222390_mcjqwb.png


Something like this looks like it would do the trick! Thank you!!

Erica
 
Damn fancy and costly. But likely will work great. Might be possible to avoid a reference rod in a hole, if the bottom of a drilled hole can be solid as with a screw there. The one I mentioned is darn cheap however.
Edit: remember to avoid also measuring wall board as with a solid pipe or other is needed at the opening. Or just use a plate on the wall board t monitor all the depth in as either or one is the culprit.
 
They’re only $70 a piece so I’d say that’s a small price to pay to get confirmation data. It likely won’t be quickly obtained but it will give results.
 
Fine, I've seen most gauges descriptions with added "stuff" in the hundreds. Finally remember both reference points have to be solid. The painted drywall may be ok, but if any variations happen when you take it off and replace it, they must be within one unit, hopefully. Otherwise nail something solid, even two flat head nails. Of course then your measurement wold not include the dry wall. Keep the drilled hole smallest possible diameter, then there is less likelihood to affect true conditions. I'd use several locations, outside and interior walls as well as upper floor areas. Temperature of test site should not vary. No sunshine, etc. Good luck.
 
Status
Not open for further replies.

Part and Inventory Search

Sponsor