Hi,
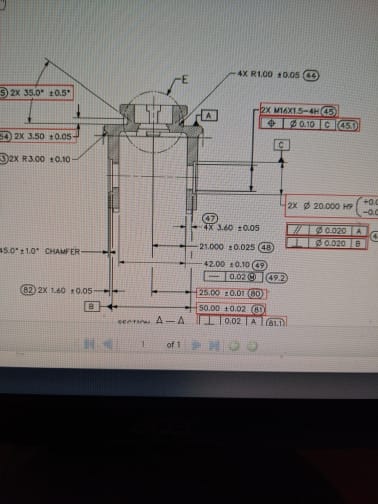
Can any of you guys have a look at the drawing i have attached,
The 42mm width between two planes has a call out of 0.02 straightness with maximum metal applied to it.
This goes back to my other thread on allowing parallelism between two non datum features.
Could someone explain exactly what the drawing is asking for here and is it the correct call out. , and the best way to check it either manually or with the use of a CMM.
Thanks
Ross


