Eng-Tips is the largest engineering community on the Internet

Intelligent Work Forums for Engineering Professionals

How do you guys connect two solid sections tangentially in NX? 3

Status
Not open for further replies.

imti7

Mechanical
Jul 19, 2023
50
0
0
IN
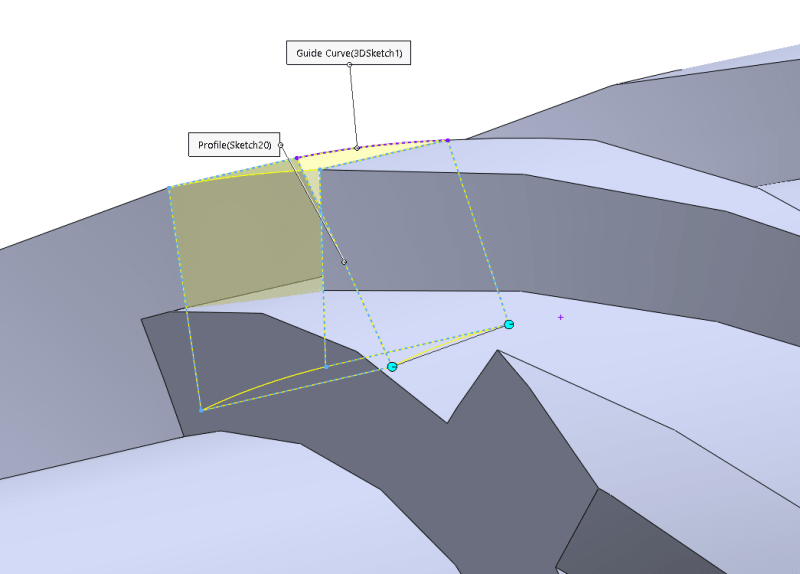
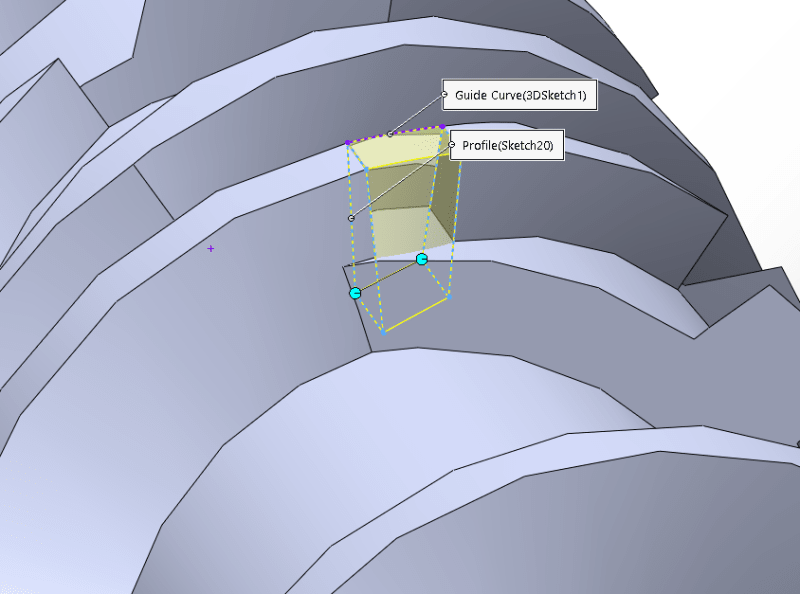
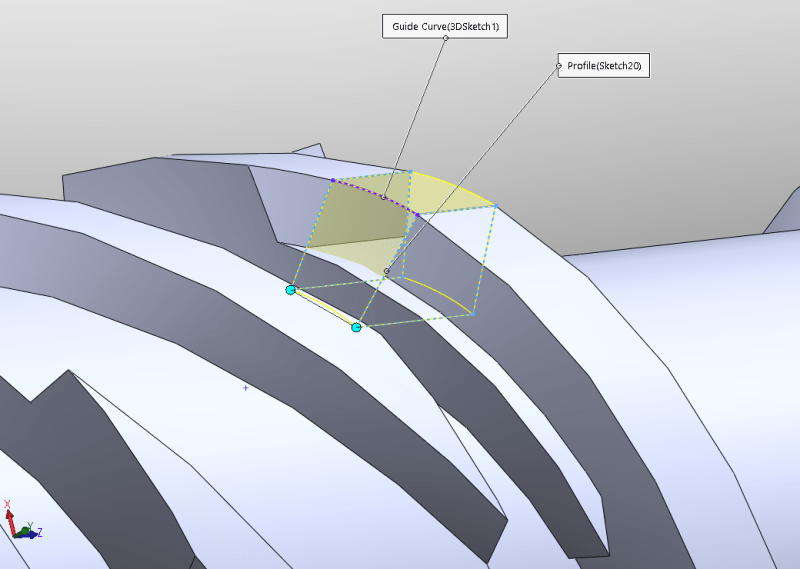
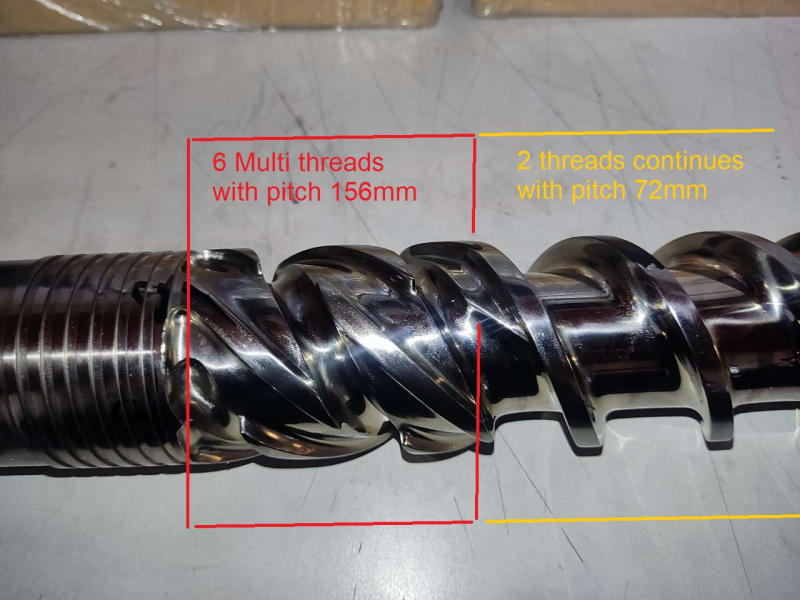
In solidworks i used to connect these helical thread using 3D arc with tangent relation btwn edge and the curve then loft two sections using 3D tangential arc as a guide curve.
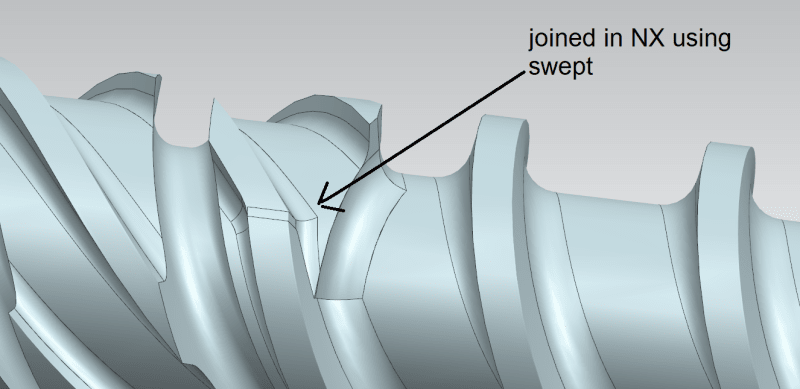
I tried the same in NX using swept but i am not getting smooth joint as solidworks and also i am not able to give tangential geometric relation for 3D curve.

Please tell me how you guys would do it in NX, i have shared a STEP file , if possible plz show me how you do it.
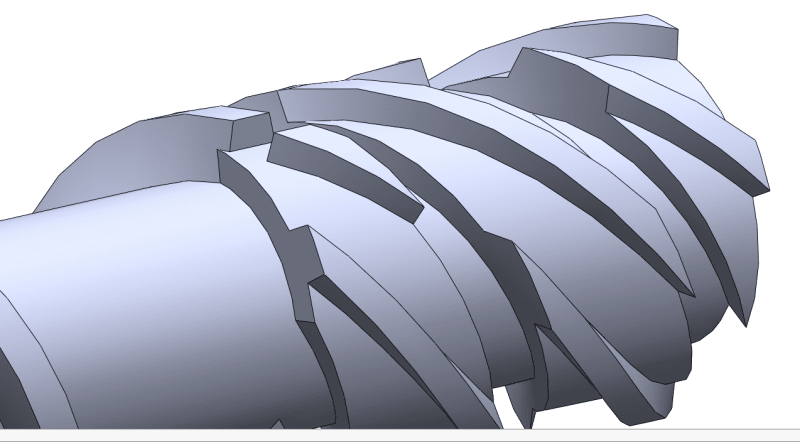
you can see below the images of i have done in solidworks
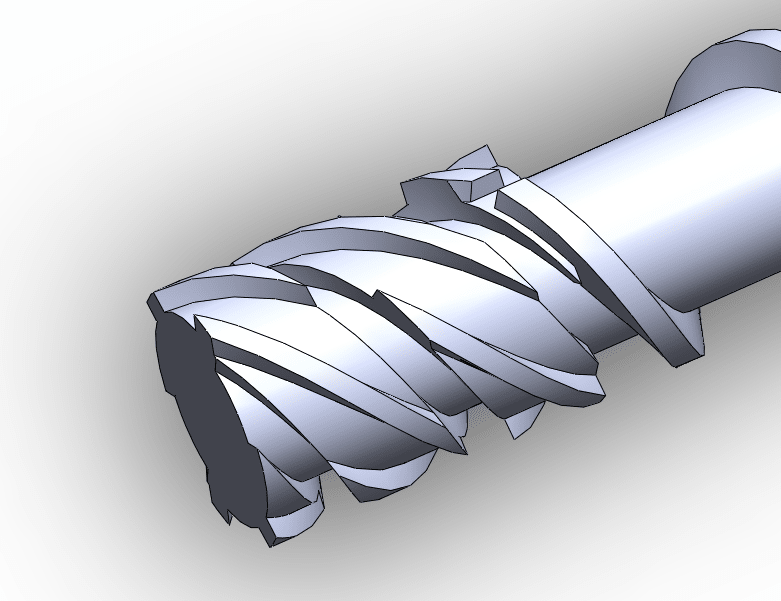
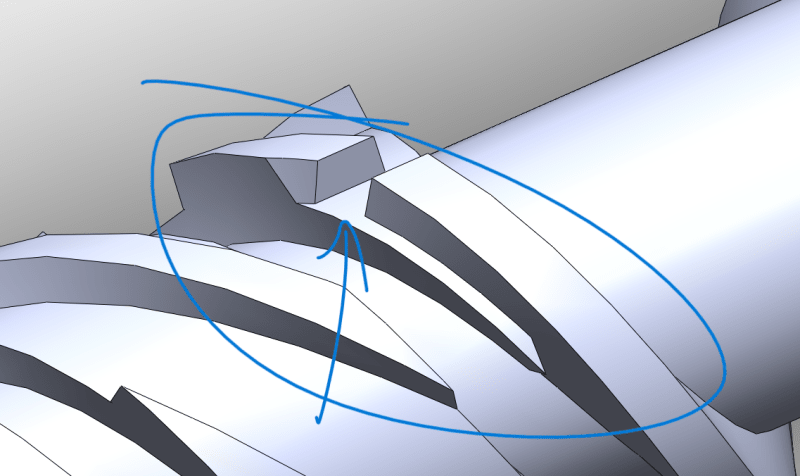
Screenshot_20230516_104050_rtqda4.png
Screenshot_20230516_103911_ceg4bk.png
Screenshot_20230516_104101_sciv1b.png
Screenshot_20230516_104021_xaablg.png
Screenshot_20230516_103906_k4ilwm.png
Screenshot_20230516_103934_mxmbmp.png
Screenshot_20230516_104132_spuady.png
 
Replies continue below

Recommended for you

I do not have access to NX currently.
Why are we attempting this ? - Why are these sections missing this piece that needs to be filled ?
Bridge curve ?
There is a curve type which will look like a circle in projection but can be twisted , can't remember the name currently.
Bridge surface ?
Thru Curves w tangent/curvature matching ?

Regards,
Tomas


The more you know about a subject, the more you know how little you know about that subject.
 
the gap is there because a single thread starts with different pitch after the multi 6 threads completed so in order to join that single thread to one of the 6 multi threads its mandatory to connect them together , and also both thread profile have little different dimensions.
i have tried through curves, through curve mesh , ruled and finally i got it in swept but not smooth joint as i wanted.
Screenshot_2023-07-24_161811_l3ib3j.png


you can see the real helical screw down there in images

IMG-20230720-WA0032_ivrm9b.jpg
IMG-20230720-WA0033_lbp7df.jpg
 
dear cowski,
currently i'm using NX 12.0 , thus i couldn't open this Higher version file,
but i will try with my friend who has access to that version and update you back .


thank you for guidance , really it will be a great help for me .🙏
 
You are in luck. I happen to still have NX 12 installed; here is a version made in NX 12. This version is mostly driven by expressions:
[ul]
[li]OD - outside diameter of thread[/li]
[li]ID - base diameter[/li]
[li]pitch1 - starting pitch of screw (closest to Z=0)[/li]
[li]pitch2 - ending pitch of screw (farthest from Z=0)[/li]
[li]length_end_pitch1 - distance along the axis where pitch1 ends[/li]
[li]length_start_pitch2 - distance along the axis where pitch2 starts[/li]
[/ul]

The difference between length_start_pitch2 and length_end_pitch1 is the transition zone. The biggest difference between the 2 will be in the transition zone. The helix command solution uses values along the axis of the helix and a cubic transition between the pitch values. The wrap curve solution simply uses a tangent arc between the linear pitch portions.

www.nxjournaling.com
 
Dear cowski,
i went through the files

1. connecting two sections- really a great and efficient approach you have showed to connect, that works for me
2. variable helix by cubic along spine method - yes this is perfect for me since we can define the points at required distance and get full control on the points
3. sketch wrap method- it doesn't seems to be not work for me , because my work objective will be reverse engineer using vernier caliper these helical screws to exact dimension 3D model to undergo CNC and sometimes we can't measure correct pitches , i have to keep changing these pitches to bring as per original geometry, with wrap method i can't preview the helix directly onto cylinder body.


i really don't know how to thank you🙏🙂, thank you so much for your help, this forum is the best i have ever seen,respect🙌!!
 
imtiyaz_bumblebee said:
with wrap method i can't preview the helix directly onto cylinder body
I may have saved the file with the "wrap curve" feature hidden, this is what will show the helix on the body.

Also, here's a couple of NX tips for quick editing:
If you have set up user expressions to drive your model, you will find them in a folder in the part navigator (above the features). You can right click on an expression here and edit the value without needing to open the full expression editor.
Similarly, if you expand the "details" pane (below the feature tree) and select a feature, the parameters will be shown. You can right click and edit values here to update the model without needing to open the feature dialog.

www.nxjournaling.com
 
thank you for the tips!..

i have recently shifted to NX from being 3 years with solidworks, so i have to get used to NX expressions now and BTW which version of NX works optimised way..Nx12 seems to be little delayed for outputs..

thank you🙂
 
Status
Not open for further replies.
Back
Top