Continue to Site

Eng-Tips is the largest engineering community on the Internet

Intelligent Work Forums for Engineering Professionals

  • Congratulations KootK on being selected by the Eng-Tips community for having the most helpful posts in the forums last week. Way to Go!

ISO 13715-2019 - figures 21 & 22

Status
Not open for further replies.

AndrewTT

Mechanical
Jul 14, 2016
261
ISO 13715-2019 Edges of Undefined Shape - Indication and Dimensioning

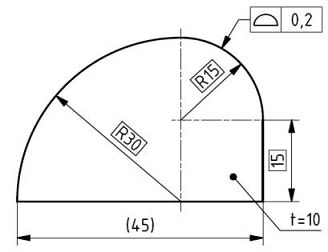
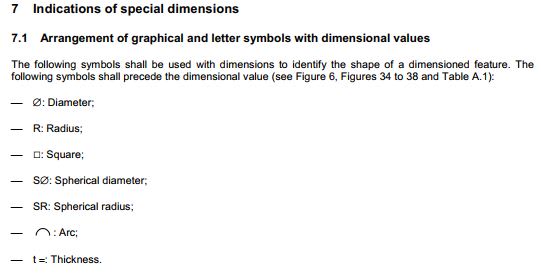
What does "t=3" signify in figures 21 & 22? If there is language in the 13715 standard pertaining to it, then I am entirely missing it. Is this a symbol that is described in a different ISO standard?

Thank you very much.

 
 https://files.engineering.com/getfile.aspx?folder=f009ea08-b4c1-45fd-9e59-c7e4016b3225&file=image_for_forum.JPG
Replies continue below

Recommended for you

Figures illustrate situation when only one view is represented and the outlines of both front and back are the same.

So, in absence of second view "t" must refer to "thickness".

"For every expert there is an equal and opposite expert"
Arthur C. Clarke Profiles of the future

 
CheckerHater,

Specifying thickness would be my guess. Do you know that, or are you guessing too?

With 3D[ ]CAD, I strongly prefer a side view with a dimension applied to the thickness, especially when it turns out the thickness is not 3mm.

--
JHG
 
Don't have standard book, but it seems pretty common:

Capture_k82ltz.jpg


"For every expert there is an equal and opposite expert"
Arthur C. Clarke Profiles of the future
 
Correction. found it:

Capture1_kafbhb.jpg


"For every expert there is an equal and opposite expert"
Arthur C. Clarke Profiles of the future
 
Status
Not open for further replies.

Part and Inventory Search

Sponsor