Hello everybody.
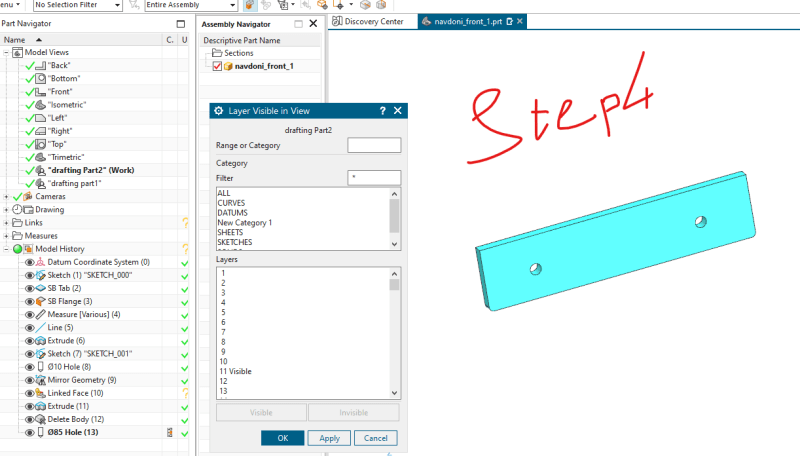
I have a model include some separated solids.
It is a single part.
I 'll need to have drafting each solid in separate sheets.
Is there any way to do that?
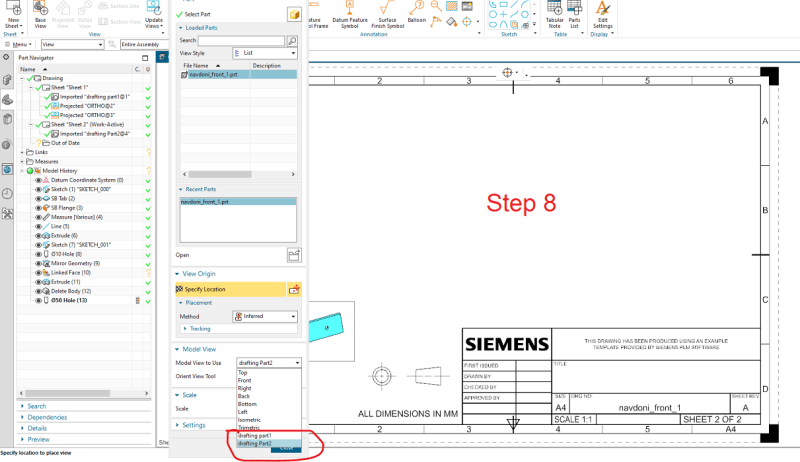
I have a model include some separated solids.
It is a single part.
I 'll need to have drafting each solid in separate sheets.
Is there any way to do that?