Dear All

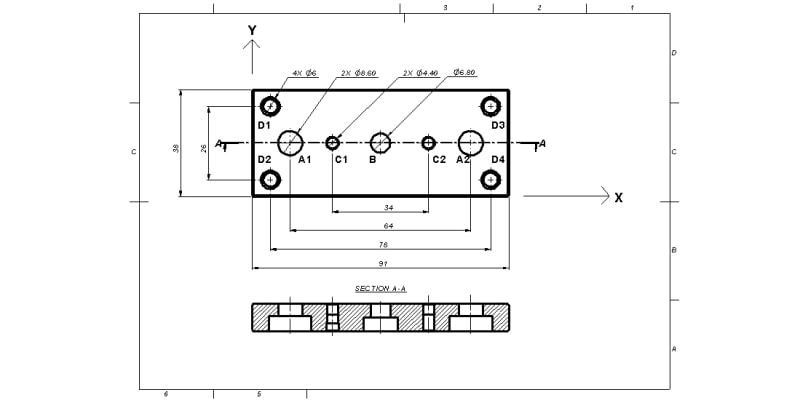
Our requirement:
1) Hole A1 and A2 shall be on same plane within variation of dia 0.05.
2) Hole A1 and A2 shall be symmetrical to hole B within variation of 0.05 along X axis.
3) Hole A1 and A2 shall be coincide with a plane passing thru hole B center axis within variation of 0.05 along Y axis.
4) Outer size 91 and 38 shall be aligned as shown in drawing.
5) Hole D1, D2, D3 and D4 shall be symmetrical to hole B within variation of dia 0.05
6) Hole C1 and C2 shall be on same plane within variation of dia 0.05.
7) Hole C1 and C2 shall be symmetrical to hole B within variation of 0.05 along X axis.
8) Hole C1 and C2 shall be coincide with a plane passing thru hole B center axis within variation of 0.05 along Y axis.
Kindly suggest us, how to define our requirement as per ASME Y14.5:2018 GD&T standard.
Thank you.
