Eng-Tips is the largest engineering community on the Internet

Intelligent Work Forums for Engineering Professionals

  • Congratulations waross on being selected by the Tek-Tips community for having the most helpful posts in the forums last week. Way to Go!

Heat Treated Stainless 440C Hole Saw Shattering. HELP!

Status
Not open for further replies.

kenshin305

Industrial
Dec 31, 2014
6
0
0
US
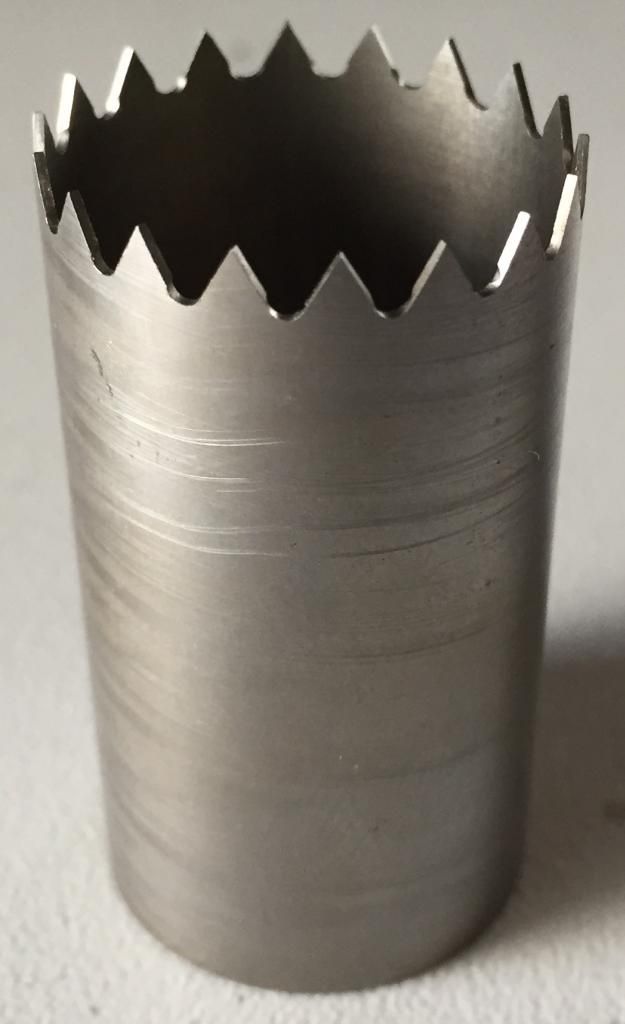
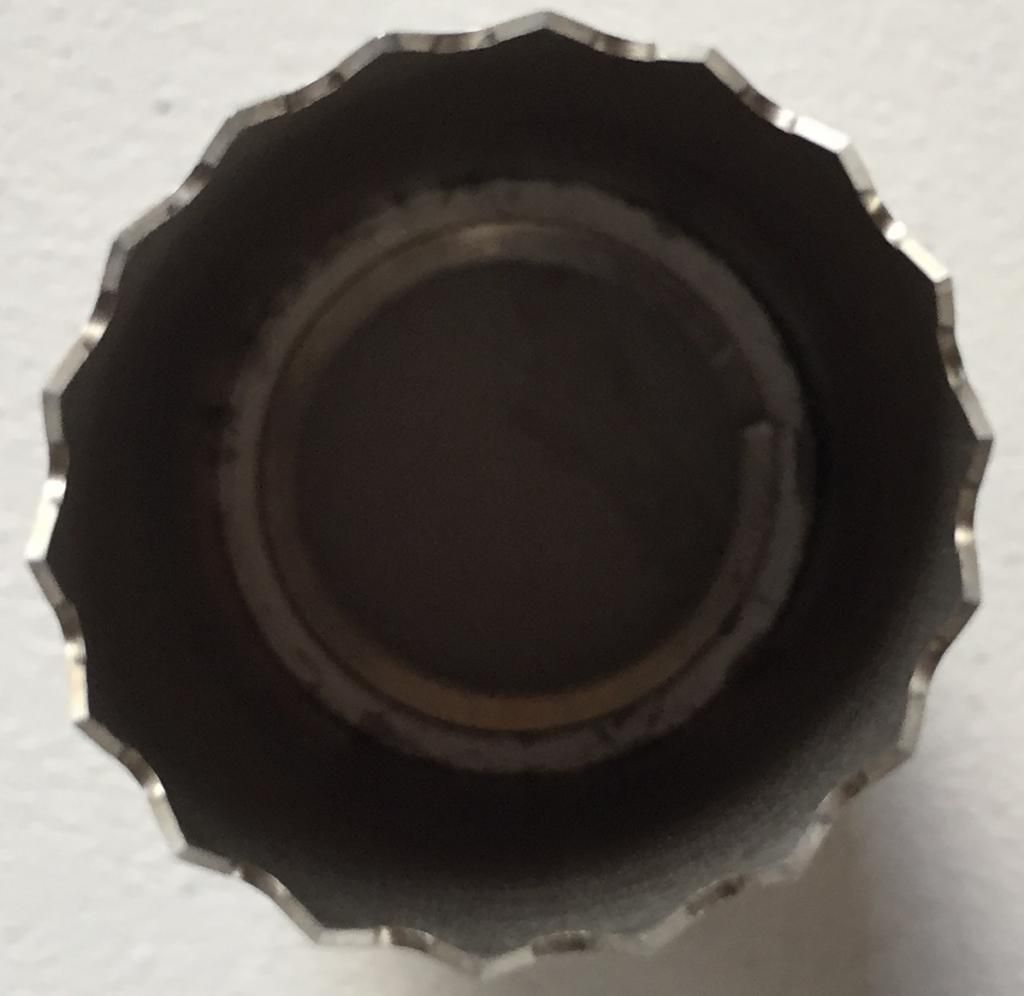
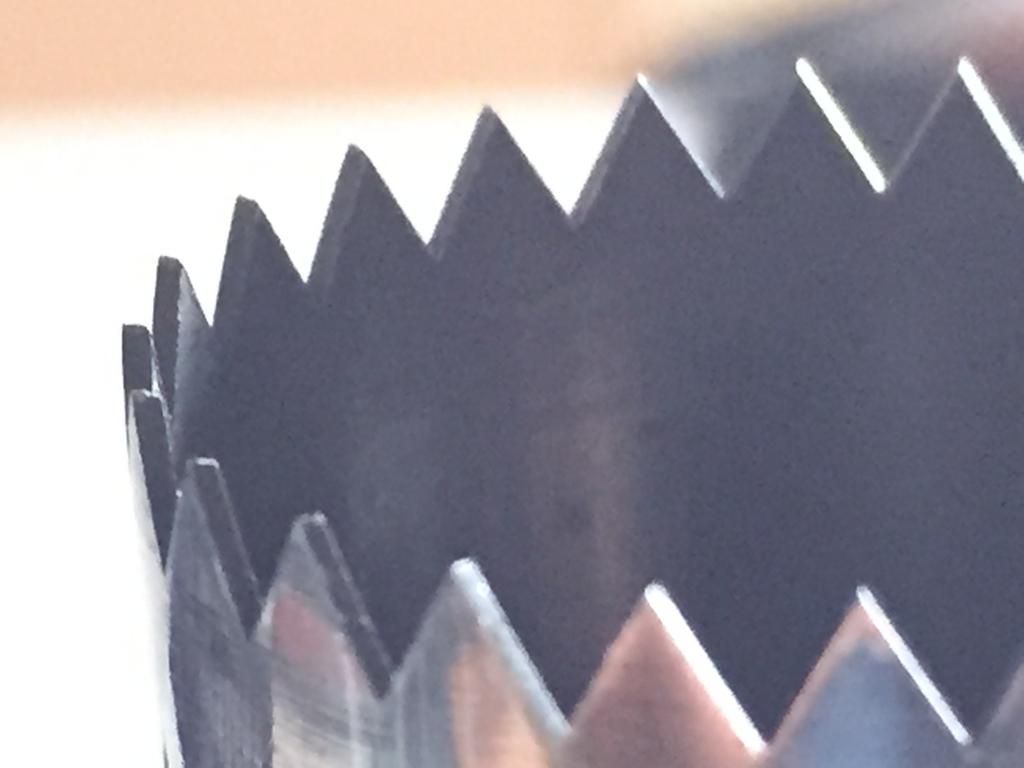
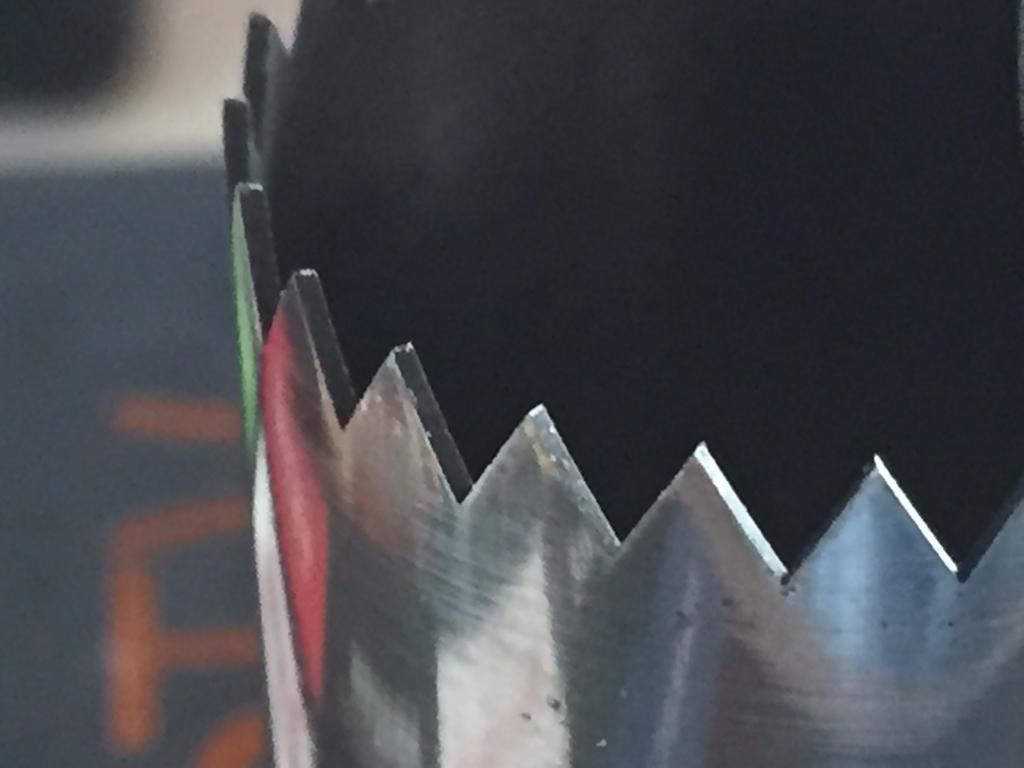
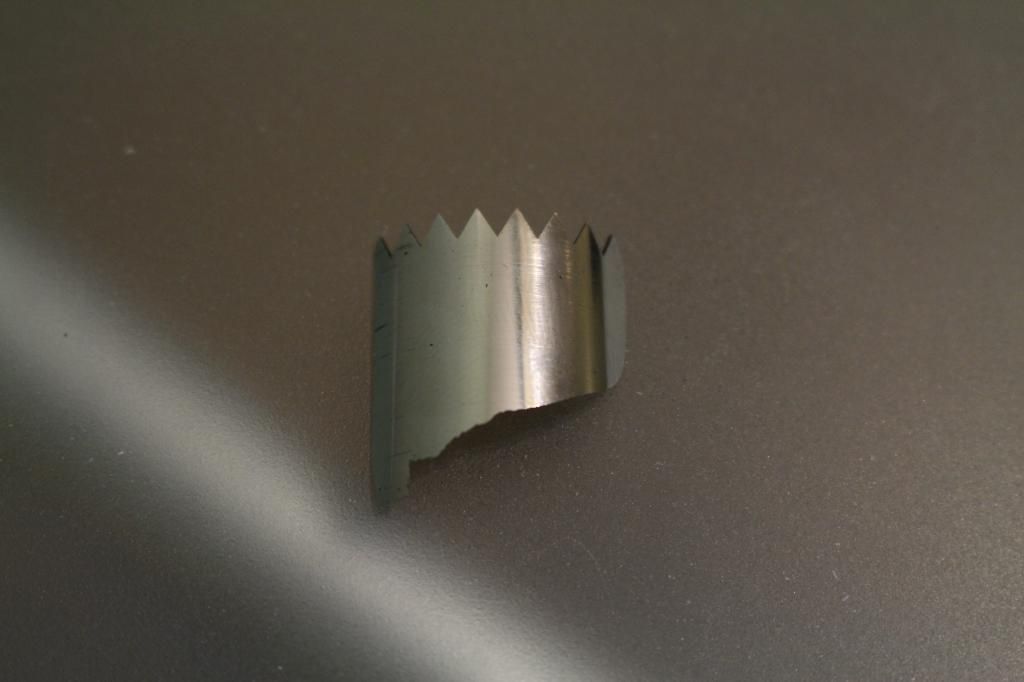
Hello, I’m an industrial engineering undergrad who is making my own stainless 440C hole saws from 1 inch OD round bar. Using a lathe, I drilled, reamed, and finally used a boring bar to get the wall thickness to 0.021” (I know, it’s very thin). I then used a mill and a v-cutter to machine the teeth. Next, I heat treatment the hole saw to get a martensitic structure. I heat treated at 1038 degrees Celsius for 30 minutes, removed and air quenched, and finally temper for 1 hour at 230 degrees Celsius.

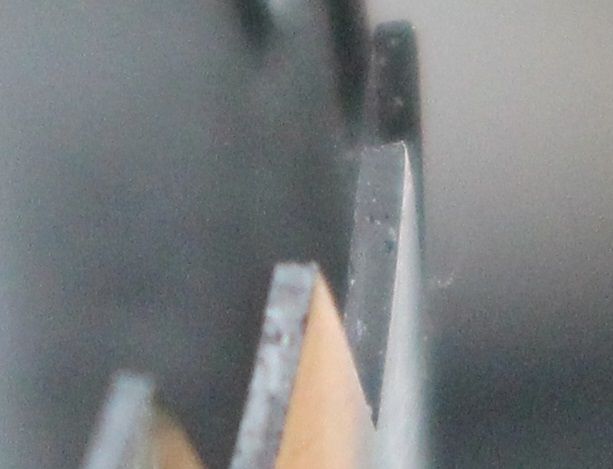
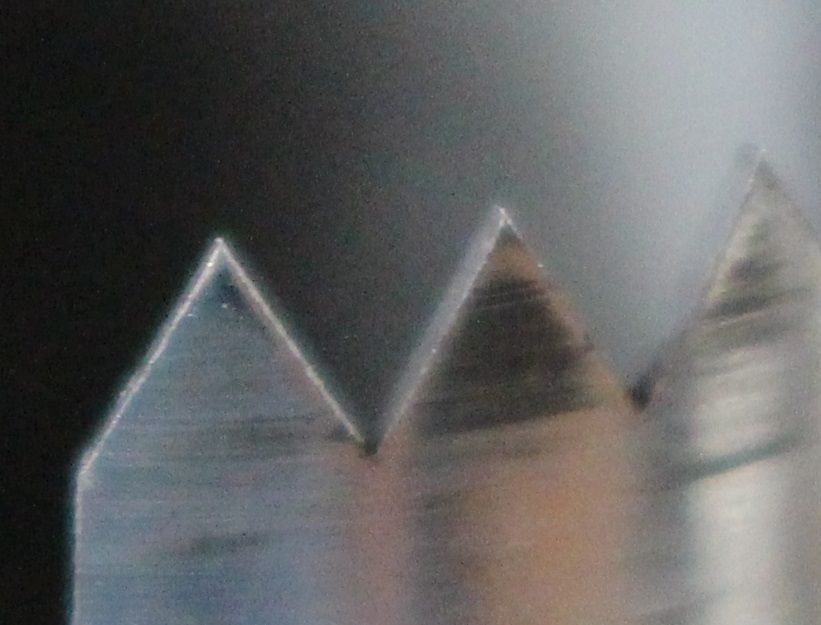
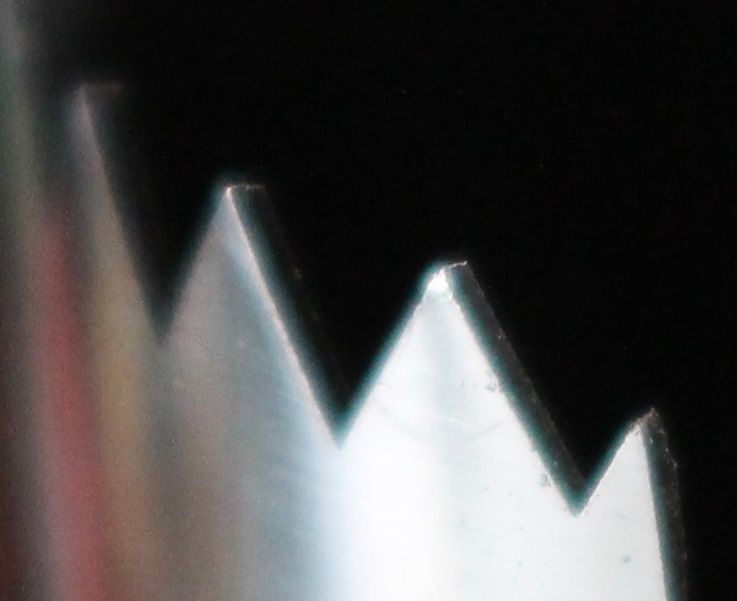
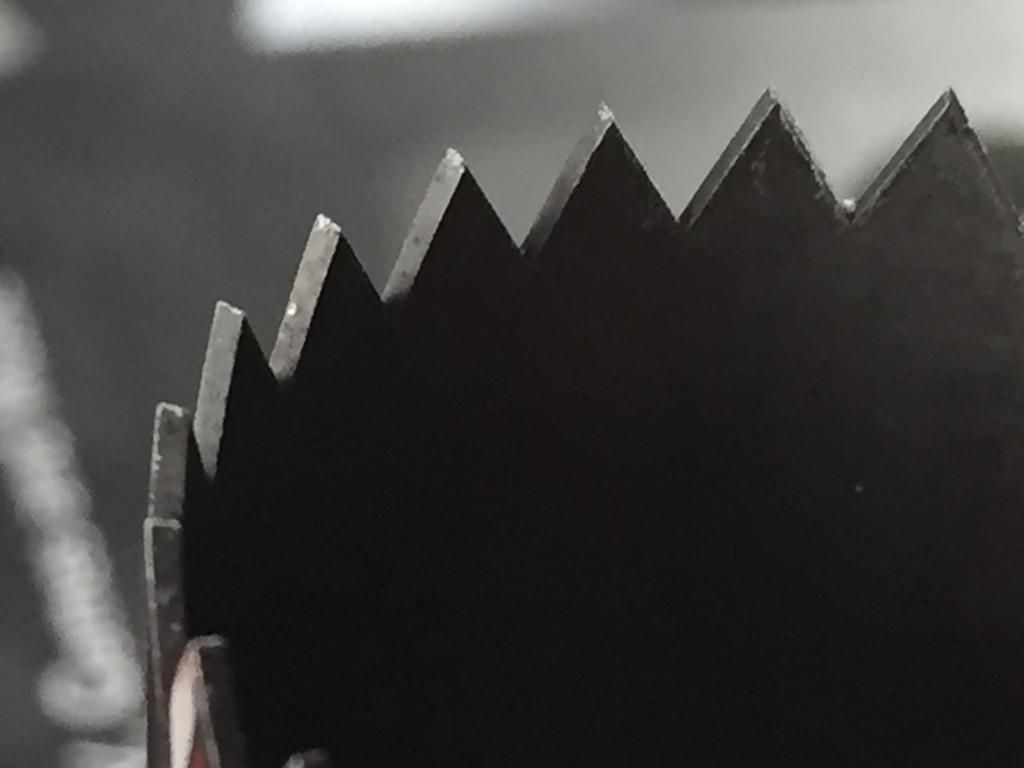
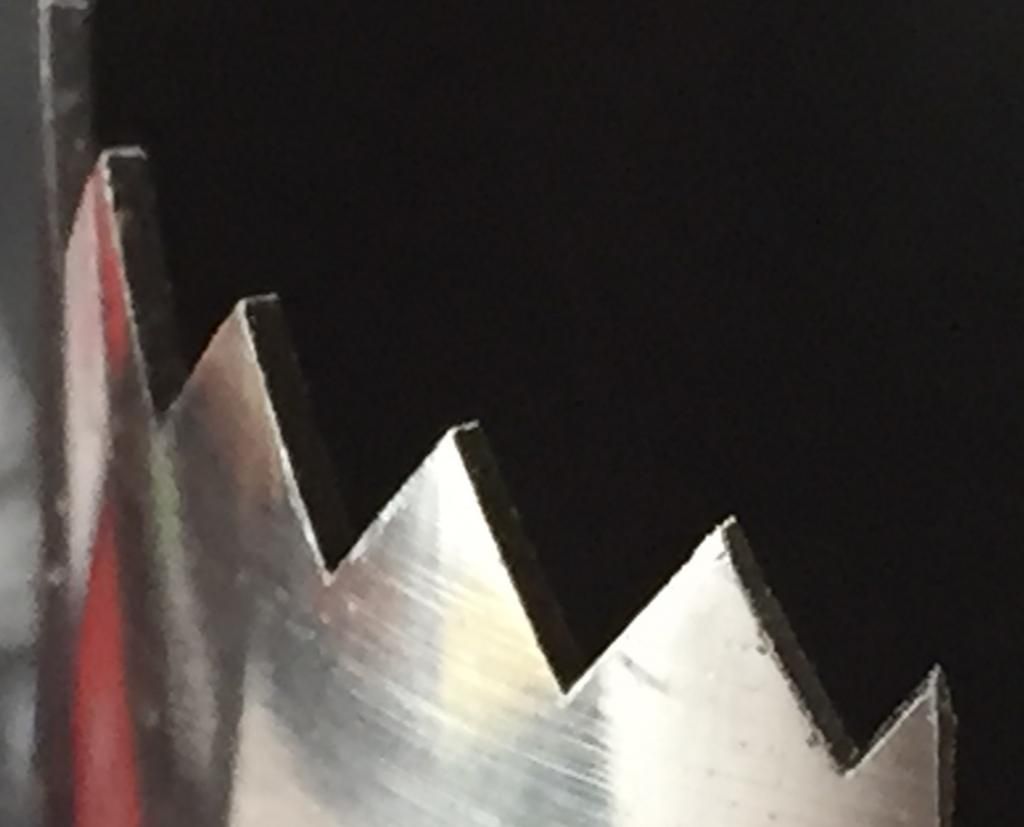
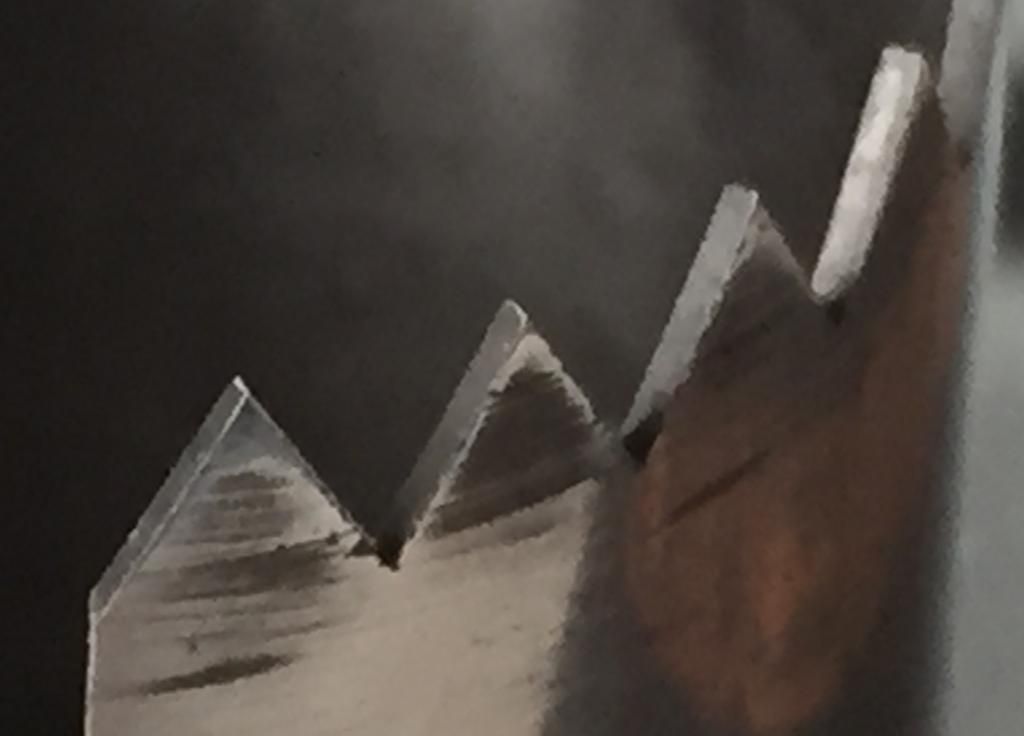
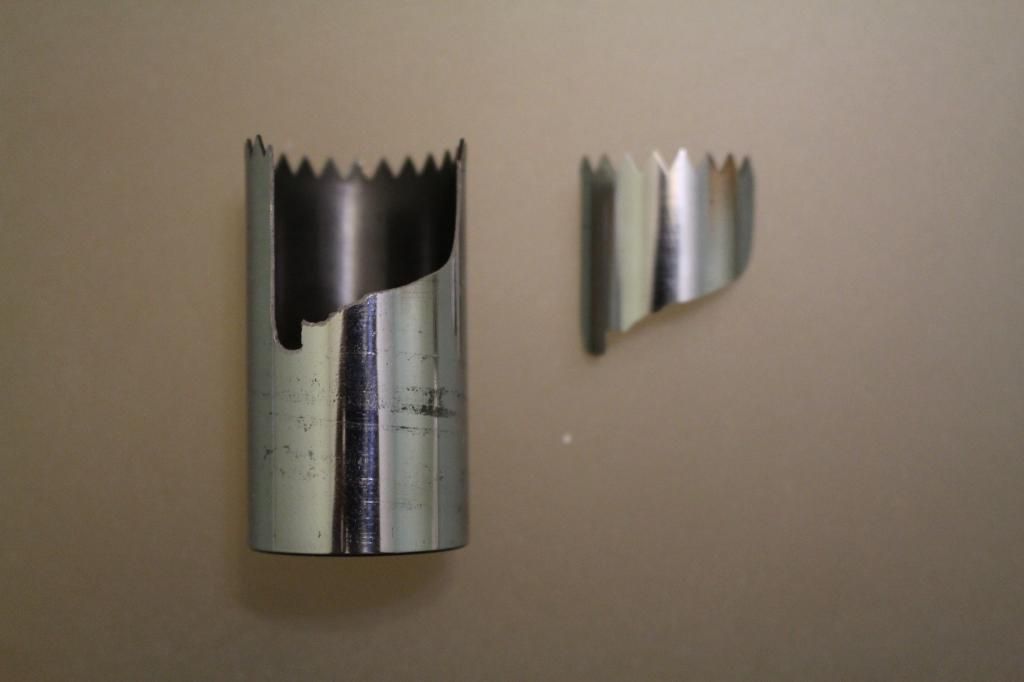
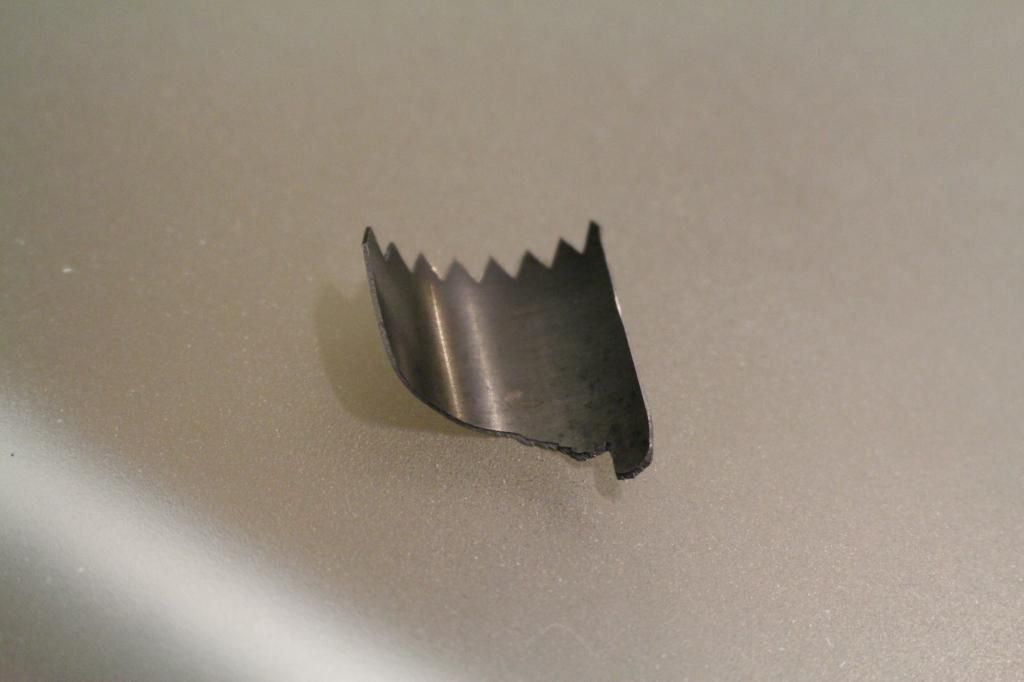
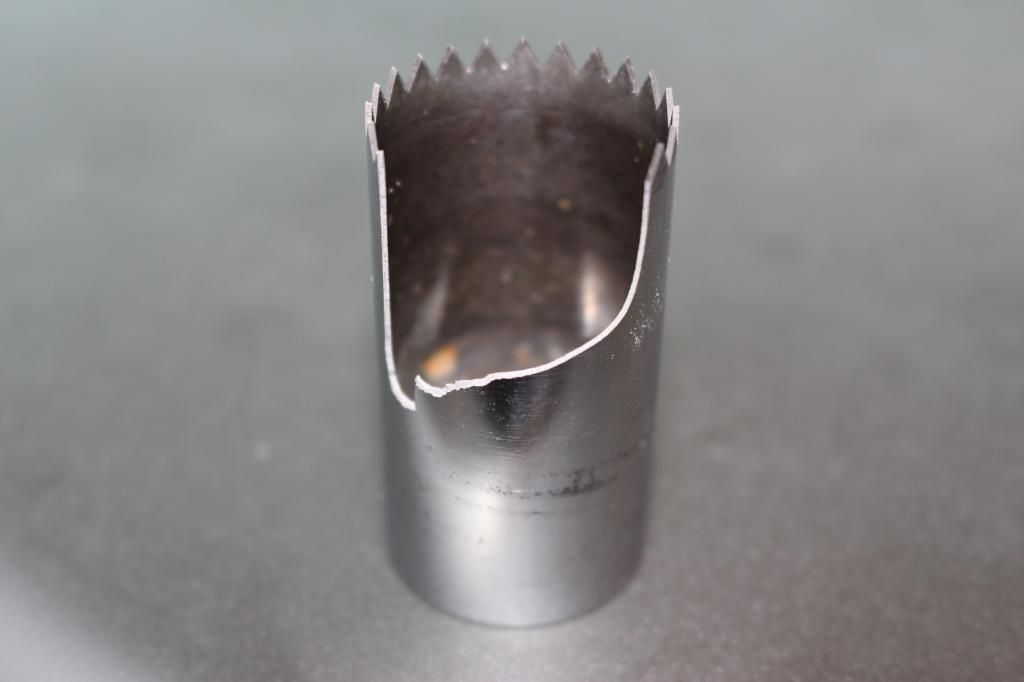
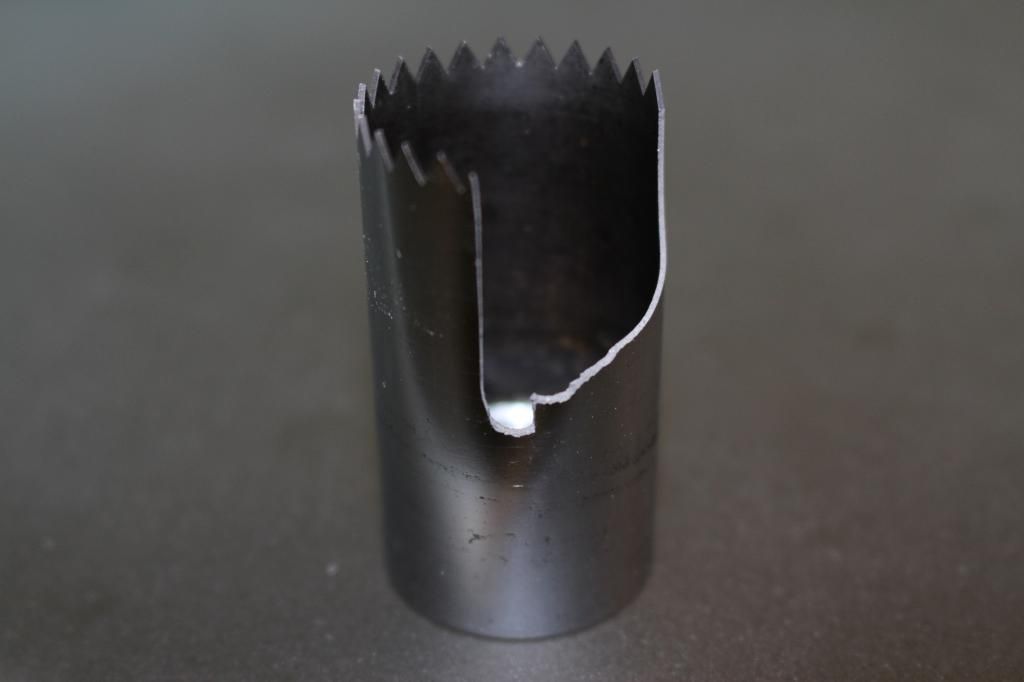
This hole saw was designed to be attached to a T-handle, to manually cut hardwood up to a ¼ inch thick. It cannot rust, and must have high hardness and toughness, which is why I chose 440C. This hole saw worked well for a year. I recently let a friend try it and it broke (see attached pictures). My friend used way more downward force than me when it broke. I feel that my hole saw has way too much hardness (no wear on teeth) but not enough toughness, almost like glass.

Can someone please advise on how to preventing my hole saws from shattering? Many of my engineering professors are baffled.

IMG_0491_zps9f3169bc.jpg

IMG_0497_zps0fd846a4.jpg

IMG_0496_zps0e26bf2a.jpg

IMG_0495_zps9afcdbb0.jpg

IMG_0494_zps3285f26c.jpg
 
Replies continue below

Recommended for you

I would also start with a google image search for wood hole saws and look at the tooth profile.

_________________________________________
NX8.0, Solidworks 2014, AutoCAD, Enovia V5
 
You could increase toughness by tempering at a higher temperature, something like 400 to 500 degrees C. Your current temper maximizes hardness and wear resistance at the expense of toughness.
 
After fixing tooth shape/loading/stress concentration issues; You could make it out of a much tougher grade of stainless steel at the expense of hardness and then use a surface coating (diamond/ TiN /B4C etc.) to impart the wear resistance you are looking for. Just make sure you don't make it too soft or you could get local yielding of the substrate that will cause underperformance of the coating.
 
I also noticed the break starting at the V root. The 60 degree tooth profile works best for me, but I can’t find a 60 degree cutter with a radius. I may have to customize one.

I will try tempering at 500 degrees C. Do you think the 30 minute heat treatment at 1038 degrees C is too long for such a thin wall hole saw? With that said, should I increase wall thickness, or can I leave it thin? This hole saw cuts faster when it’s thin.

Can anyone recommend a tougher grade of stainless steel that is widely available?

Thank you guys for all the great advice.
 
"Can someone please advise on how to preventing my hole saws from shattering?"

Training and being more selective in whom your tools are borrowed to. All hands are capable of holding tools, but not all should.

Other than tooth profile, it looks like to me that you did a very nice job of it. 440C is great stuff. Another option would be to pull a little more temper on the tool, and laser harden the tooth edges.


It is better to have enough ideas for some of them to be wrong, than to be always right by having no ideas at all.
 
420 would be an option for a tougher & slightly softer steel. Agree with the radii, increased tempering temperature and TiN coating. All those should help and should be enough to get the 440C to work very well.

----------------------------------------

The Help for this program was created in Windows Help format, which depends on a feature that isn't included in this version of Windows.
 
ornerynorsk, I will temper at a higher temperature. I didn't realize that I could laser harden the edges, so I will look into that.

dgallup, I was looking at both stainless 420 and 17-4 PH.

What do you guys think about induction hardening? Many of the hand saws in Home Depot are done this way. It would keep much of the hole saw tough, and only take seconds compared to traditional heat treatments.

Thanks again guys.

 
Since you know the pitch of the teeth, drill holes where the root of the teeth would be before you cut the teeth. Cut the teeth into the drilled holes. This would create the round root and even some chip clearance.

Ted
 
hydtools, that's genius. I could do it in the mill using a small carbide endmill and an indexing head. I could still use my v-cutter without trying to customize it. Thank you.
 
Maybe you need to angle the cutter spindle or use an asymmetical V-cutter. The top rake angle of the teeth is all wrong. ... which is probably why your friend leaned on the cutter and broke it.

... which might have been slightly less likely if the 'cup' section were not much deeper than the thickness of the sheet you're cutting, and had a blend radius at the bottom.

... and if you had set the teeth a bit to provide clearance behind the cutting edges.

Seriously, go to a hardware store and study commercial hole saws, and Japanese style handsaws.


Mike Halloran
Pembroke Pines, FL, USA
 
You've provided several photo's of the saw: but none up close of the tooth profile. I think there are several things you can do literally at "the point of the tooth" to improve cutting - which is your goal after all.

Can you provide an axial and a radial close in photo of the "average" tooth?
 
Mike,

By increasing the amount of teeth, I can decrease the height of the “cup” section. I want to go from 24 teeth to 36 teeth. Attached is an image of a hole saw I created with a 1/16” TiAlN endmill. On the mill, I used an indexing head and rotated the vice 60 degrees clockwise, and then 60 degrees counterclockwise to machine the teeth. When it was quenched in oil, it warped, so I never really used it (I only air quench now).

I’ll buy a smaller diameter endmill to machine a hole saw with more teeth. My concern is chip clearance. I’m honestly not sure how to set the teeth accurately. I’ll look into it and try to set something up in our machine shop.

Thanks, and Happy New Years guys.

IMG_4118_zpsc9cdd0f9.jpg

IMG_4121_zps66a449f7.jpg
 
Racookpe,

Attached are some images I took with my iPhone 6 and a DSLR camera. I don’t have the best lens for this. Hopefully these are the angles you requested. Any input would be greatly appreciated.

Thank you.

IMG_0504_zps82361f34.jpg

IMG_0503_zpsd8f01f08.jpg

IMG_0502_zpsa63ff197.jpg

IMG_4117_zpsfeffef71.jpg

IMG_4114_zps01366f92.jpg

IMG_4113_zpse971a939.jpg

IMG_4109_zps57758ad9.jpg

IMG_4107_zpsa8de68f9.jpg
 
Since you're machining the cup from a solid bar, you have the option to do something unusual, instead of manually setting the teeth. Just bottle bore the inside, and similarly taper the outside, so the teeth are wider at the tip than at the root.

Now, about the tooth shape. The shape you've used will cut equally well in either direction of rotation. Each tooth will just sort of drag on the wood, and hopefully wear off a little wood dust, instead of digging up a chip. It probably gives you a nice finish, but takes forever to complete a hole.

If instead you notch the shell so that one face of each tooth is parallel to the axis of rotation, then the saw will cut in only one direction of rotation, but it should cut a _lot_ faster. You might even angle that tooth face a little more than perpendicular, so it has a positive 'top rake'. Look that up in, e.g., Machinery's Handbook, in the section on cutting tools.


Mike Halloran
Pembroke Pines, FL, USA
 
You also need just a small gap between cutting cup wall and the final hole for clearance, friction elimination, and chip movement and removal. Look very very closely at your band saw blades or a hack saw blade under a magnifying glass. each tooth edge is very slightly twisted so the cutting width at the tooth front edge is lsightly wider than the blade root thickness. This provides that clearance: 0.002 to 0.005 is all that is needed. Adrill's web behind the two front cutting surfaces is also slightly narrower than the tip for the same reason.
 
Status
Not open for further replies.
Back
Top