tainest77
Materials
- Mar 8, 2020
- 12
Hello everyone,
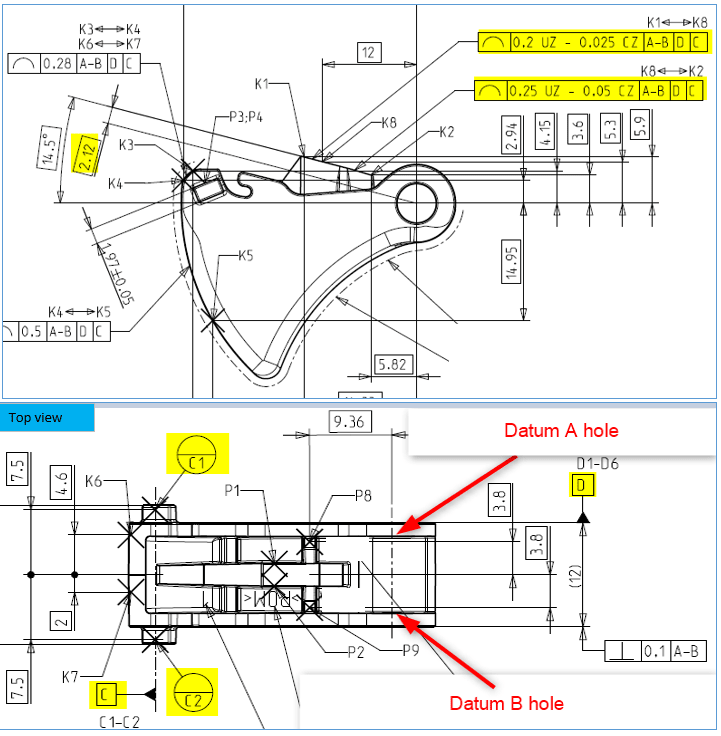
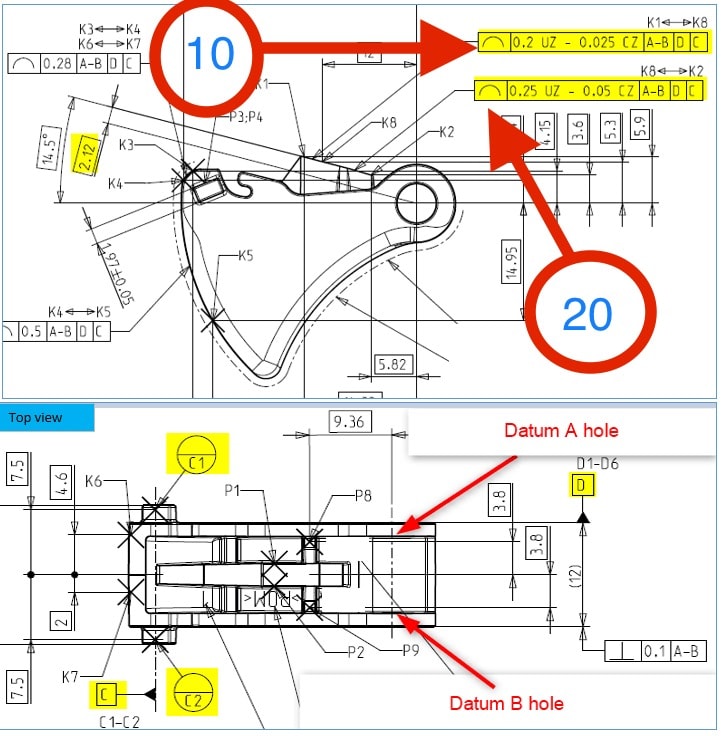
Would someone help please with the two highlighted line profiles on the attached drawing. (1) Is this intended to be one result and two tolerances or two results--one for each tolerance. (2) Provided that A-B datum is 3Dline between the two mounting holes (one on the other side). D datum is mid plane constructed from both main faces of this part. C datum is 3Dline as shown on attached. I already constructed the 3Dcurves from which these 2 line profiles will derive. Also what's the 2.12 and the 14.5 angle implication on this--Do I must use them? And by the way this is as per ISO standard. Big thanks to all.

Would someone help please with the two highlighted line profiles on the attached drawing. (1) Is this intended to be one result and two tolerances or two results--one for each tolerance. (2) Provided that A-B datum is 3Dline between the two mounting holes (one on the other side). D datum is mid plane constructed from both main faces of this part. C datum is 3Dline as shown on attached. I already constructed the 3Dcurves from which these 2 line profiles will derive. Also what's the 2.12 and the 14.5 angle implication on this--Do I must use them? And by the way this is as per ISO standard. Big thanks to all.


