ANE91
Structural
- Mar 31, 2023
- 336
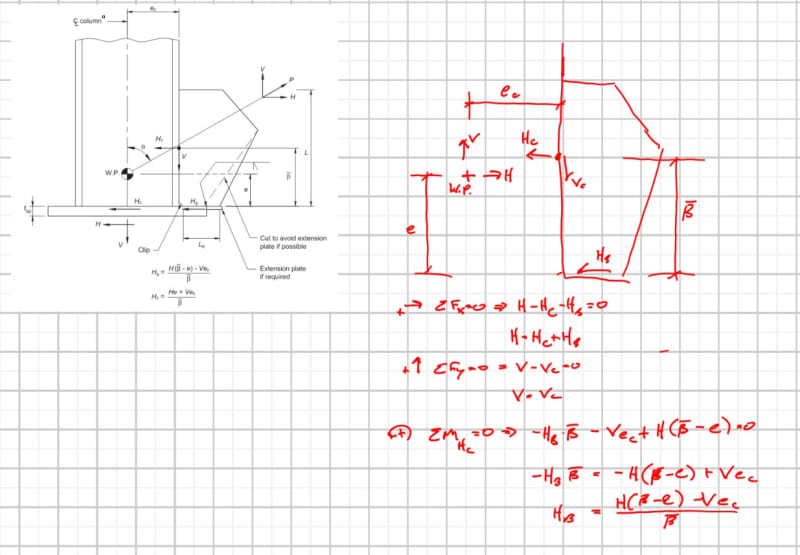
I am having trouble deriving the equilibrium equations provided in Fig. 4-22 of AISC's Design Guide 29, entitled "Vertical Bracing Connections - Analysis and Design." Refer to Sections 4.2.4 and 4.3 for a discussion of the analysis procedure(s).
Considering Example 5.12, I can only replicate the solution using the equilibrium equations of Fig. 4-22. I cannot reproduce this solution using traditional UFM equations. My Mathcad sheet is attached.
I have scoured the internet for this derivation and cannot find it. Thornton's AISC lecture on YouTube glosses over this case. The Seismic Design Manual goes into some detail on page 257 of 439. I understand that it is founded in moment equilibrium, but I cannot sketch or visualize the configuration that produces the two equations in Fig. 4-22.
Can someone demonstrate this derivation, please?

